Antarctic Pemmican Recipe
Food from the Deep South
How to make pemmican, fairly easy, time consuming.
Food technology, cookery, science
 Pemmican
in Antarctica is one of the two foods that Antarctic exploration
was built on, (the other is
sledging biscuits).
Pemmican was used as a sledging food when travelling away from
the main base and camping in sub zero (often very sub
zero) temperatures. It is a highly condensed form of
food made from dried and ground meat mixed with a similar weight
of fat, a small amount provides a lot of energy, it is almost
entirely protein and fat with very little carbohydrate. These
days in Antarctica pemmican has been replaced by freeze dried
meat for use when camping, this recipe attempts to create the
kind of pemmican that the early explorers of Antarctica would
have had. In the early days of Antarctic exploration, pemmican
was used to make hoosh
along with sledging
biscuits and snow.
Pemmican
in Antarctica is one of the two foods that Antarctic exploration
was built on, (the other is
sledging biscuits).
Pemmican was used as a sledging food when travelling away from
the main base and camping in sub zero (often very sub
zero) temperatures. It is a highly condensed form of
food made from dried and ground meat mixed with a similar weight
of fat, a small amount provides a lot of energy, it is almost
entirely protein and fat with very little carbohydrate. These
days in Antarctica pemmican has been replaced by freeze dried
meat for use when camping, this recipe attempts to create the
kind of pemmican that the early explorers of Antarctica would
have had. In the early days of Antarctic exploration, pemmican
was used to make hoosh
along with sledging
biscuits and snow.
Pemmican has it's origins with the native peoples of North America usually being attributed to the Cree in particular who lived and still live in the cold northern regions of the continent mainly in Canada. It is an ingenious way of preserving meat in large amounts in a condensed form for many months without canning, freezing or similar means that require technological or industrial scale equipment.
The qualities of high nutritional density, being long lasting and being physically resilient along with ease and speed of cooking (more of that later) or able to just be eaten cold as it is made it an ideal foodstuff for the early Antarctic explorers to use away from base.
There are a lot of recipes online for pemmican, it seems to have recently achieved a bit of a celebrity status due to the "Paleo diet". The original recipes would include dried berries, though this wasn't the case with the kind of pemmican that made it down to the Antarctic. The last Antarctic pemmican I had was made from the reindeer herd that used to live on South Georgia.
This is the first time I made pemmican, I'm not claiming to be any kind of expert, just recording my experience from a different perspective to the usual.
The Meat

Ingredients
- Lean dense meat, traditionally buffalo, reindeer (caribou) or deer. I didn't have any of these available so I used beef - min about 500g to 1kg (1.1 to 2.2 lb.)
- Fat from the same kind of meat, purchased extra fat of the same kind if there is not enough on the piece you buy) - around 250g of fat for 1kg of meat, the meat will be dehydrated and much lighter when the fat is added.
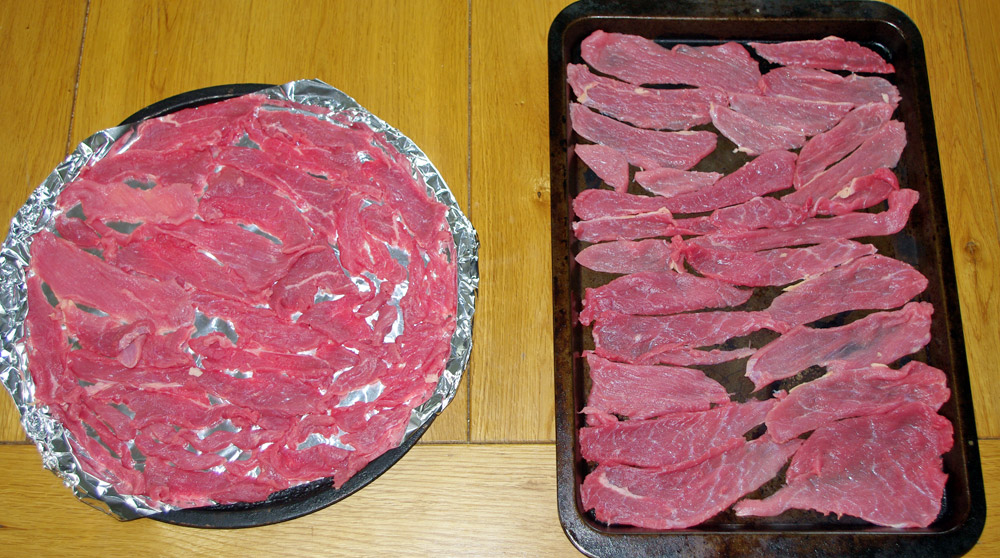
The meat should ideally be very lean with a minimum of marbling (i.e. little or no fat within the meat itself). I bought a piece of top rump which was in the supermarket "Essentials" range (i.e. the cheapest) it looked to me to be exactly the same as the normal range but 60% of the price because it was a fairly small triangular shaped end piece which wouldn't have roasted evenly as it was tapered. None of this matters for pemmican as it's going to be thinly sliced and finely ground, it was ideal for my purposes as the meat only had surface fat on it, no marbling. This being England and because we like our roast beef it had a big slab of loose basting fat added by the butcher which supplied all the the fat needed to make pemmican.
My piece of meat + fat was about 1.2kg (2.6 lbs), I was limited by the amount of drying room I had in the oven and ended up using about half the meat for pemmican (the rest made some nice sandwiches when the thin strips were fried!). Cut off all the external fat you can and put to one side to be used later.
Step 1 - dehydration
-
I cut the meat into strips as thin as I could comfortably manage which were about 3mm (1/8th"), a sharp knife is needed for this, I used the steel to sharpen before I started and then again about half way through.
-
The slices of meat were spread onto trays with no folds or overlaps.
-
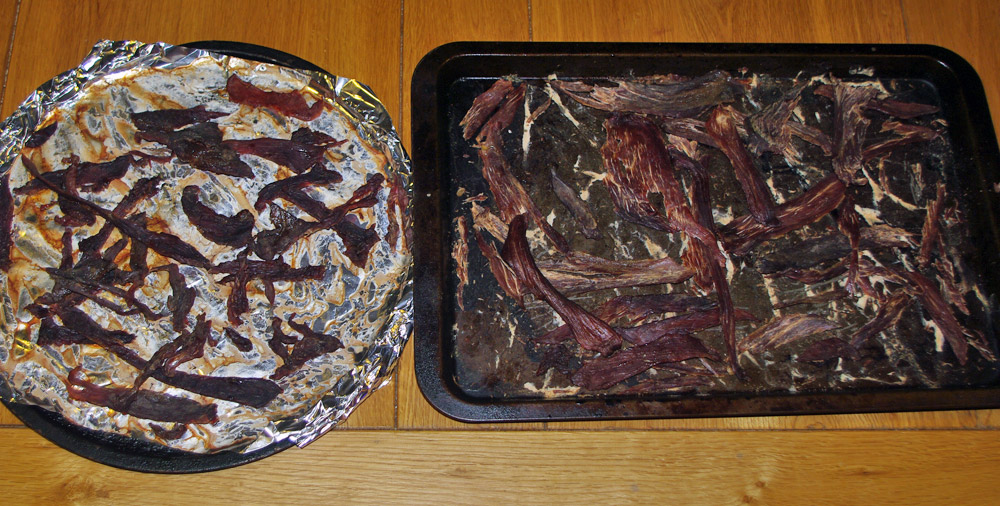
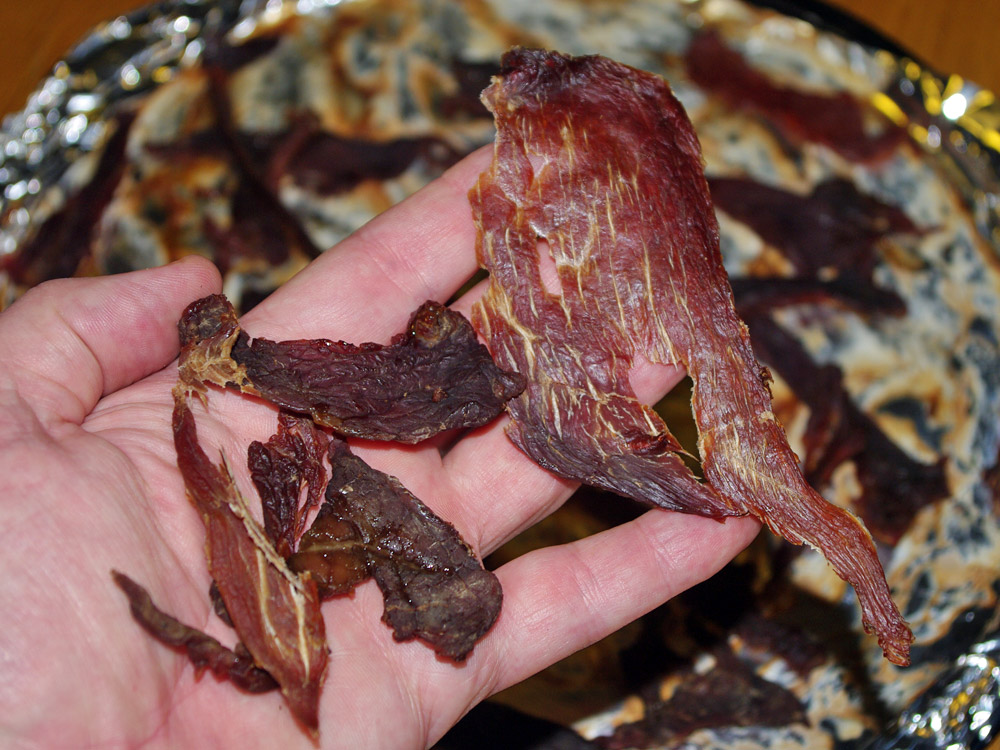
Pemmican recipes I consulted said to dry at about 150-180 F, that is 65 to 80 C and made dire warnings about not cooking it. Above 60C it is going to cook, albeit slowly and as my ovens lowest setting was 70C I went for that. Drying times given are often 12 hrs + or maybe 24 + even. I found the meat perfectly dried out after 7 hours which may be down to the fan in the oven. The meat should snap when drying is complete, at this point you have made jerky (try not to eat it all). My wife who is a great fan of beef cooked rare looked at me with a mixture of horror and pity at this point, I tried to rise above it.
You could skip this step by buying ready-made jerky.
Grinding the meat and adding the fat
Step 2 - Prepare the fat
This takes a while, so you can get it started while you move onto step 3 coming back to check it every now and then.
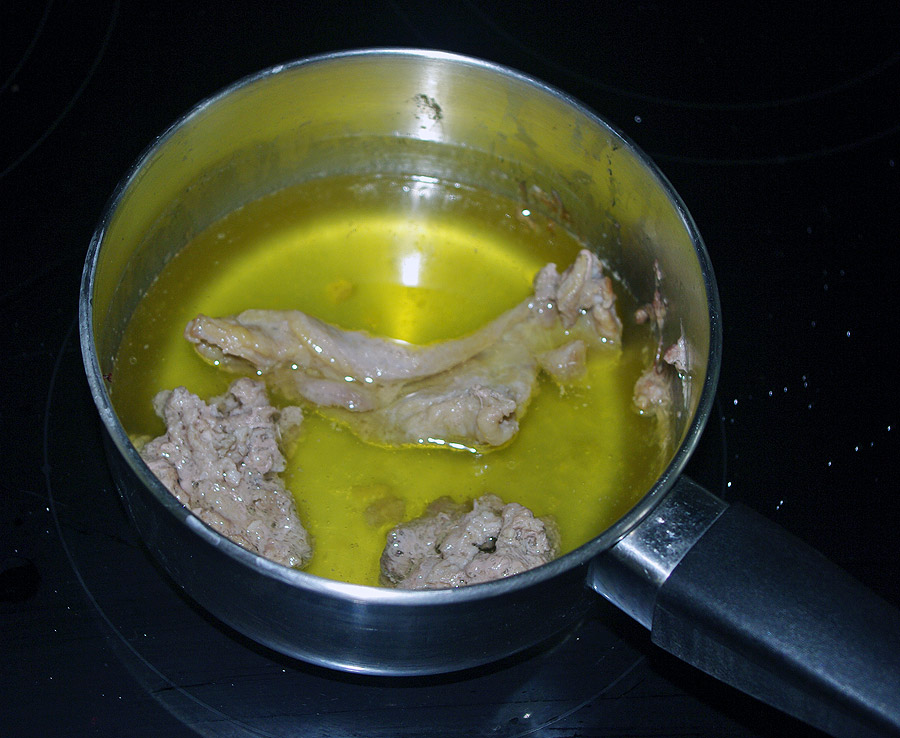
I took the basting fat that was tied onto my roasting joint and all the bits of fat I had cut off the meat before I started to slice it and put them in a pan. I put this on a low to medium heat to melt the fat and left it a little while until any moisture had been removed. I have read about this taking 4 hours or more, it took me about half an hour, I put it down to drier fat and a more vigorous heating regime.
When the fat has all melted and the water been driven off take it off the heat to cool, but don't let it set, remove the solid pieces maybe in the direction of the dog or bird table. This is called tallow, but that reminds me of candles and I don't like to think I'm making food from candles, so I call it fat.
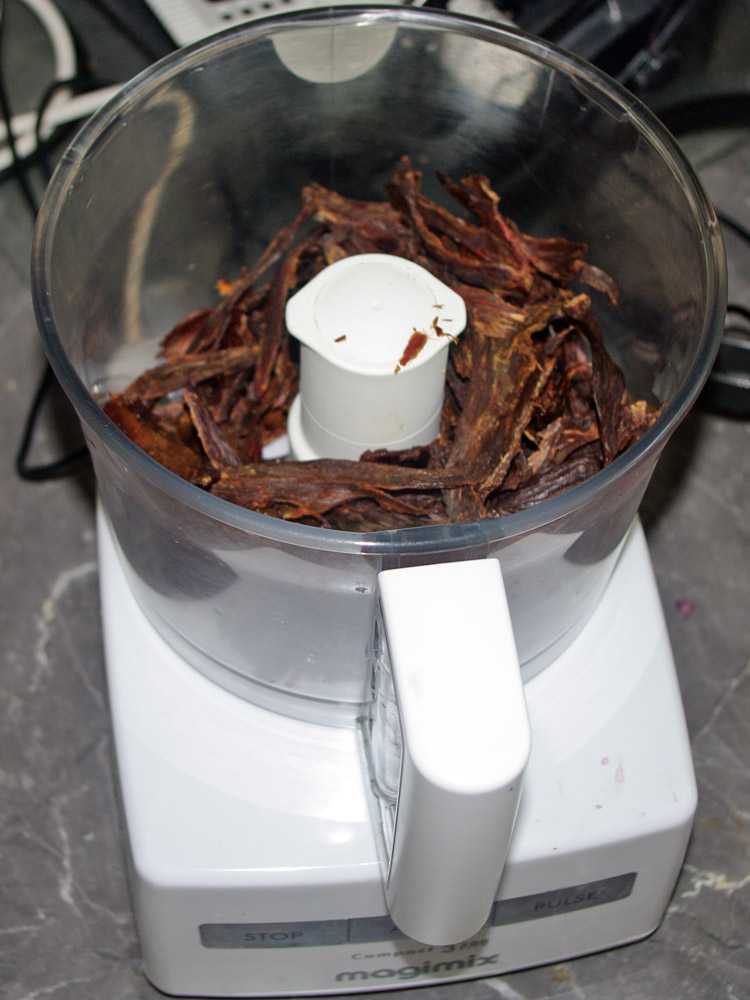
Step 3 - smash it all to bits
This is the point where my modern kitchen met its limitations. You know any of those documentaries you have ever seen where the women of the village sit around chatting or singing together while they pound some kind of grain in big wooden bowls using a big wooden stick that still look more like logs than cooking equipment? Well that's exactly the kind of equipment you need here and probably exactly what the Cree used when they converted entire buffalo into pemmican to store for the winter.
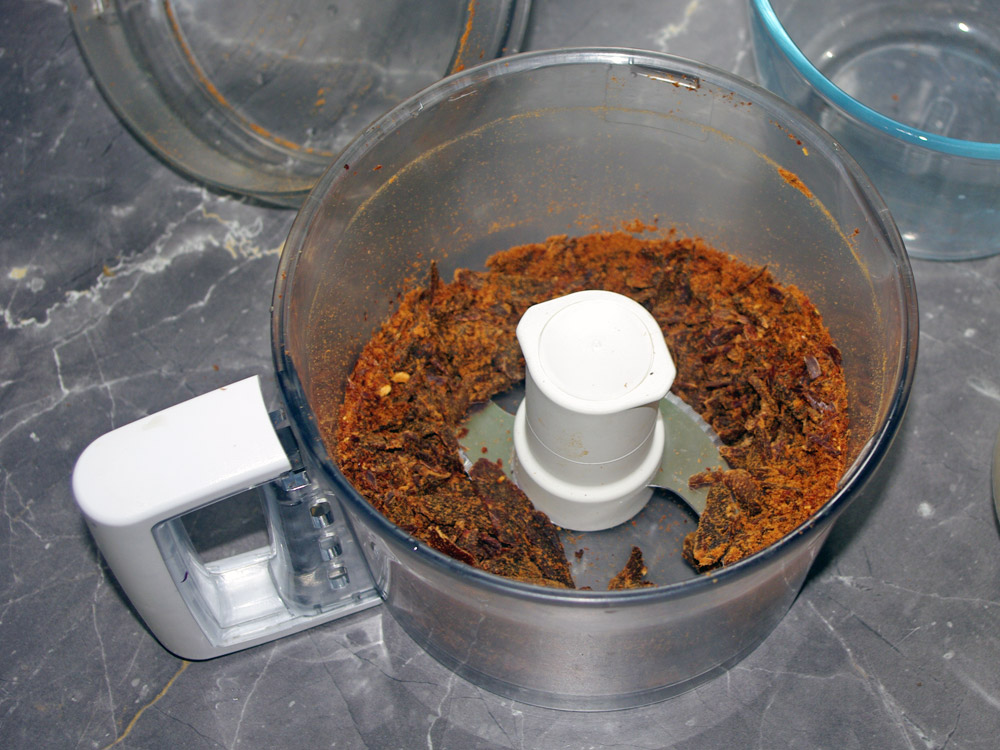
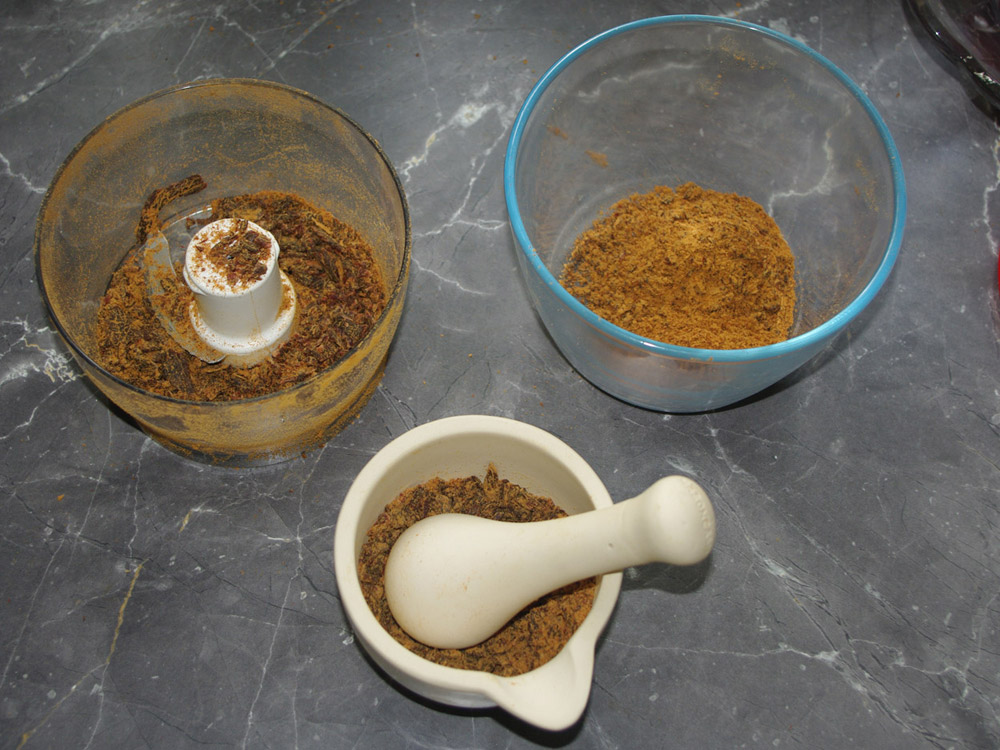
Ideally the beef should be ground finely into meat powder.
I tipped the strips of dried beef into a food processor and blasted it (what a noise!), some of it turned to powder, some of it just went round and round for the ride. I took out the larger pieces and added them to a pestle and mortar (never can remember which bit is which) and ground away until my arm ached and I started to sweat. While doing this I decided I would settle for the "crunchy" version of pemmican. I prefer crunchy to smooth peanut butter, so I thought I'd probably like pemmican better that way too.
Step 4 - add fat, stir and pour into moulds
Once the meat is ground as finely as you are happy with and your fat is melted, it's time to add the two together. You can filter the fat, though I didn't as mine was clear already, you should add it at the ratio of 60:40 ground meat to fat by weight, though as I've read that the amount can vary according to season I didn't bother weighing it.
By this point there was a fine film of meat dust on my hands, all implements, the work surface and just about everything I'd touched and I wasn't keen on spreading it further onto the scales and surrounding area. I added the melted fat to the ground dry meat until it couldn't absorb any more and poured it into a rectangular mould I made from folded aluminium foil and placed it in the fridge to solidify.
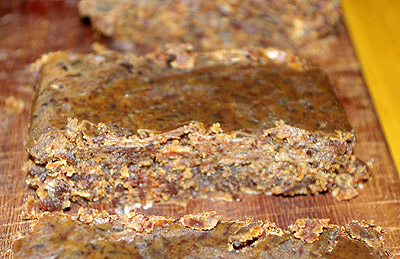
Pemmican yay!
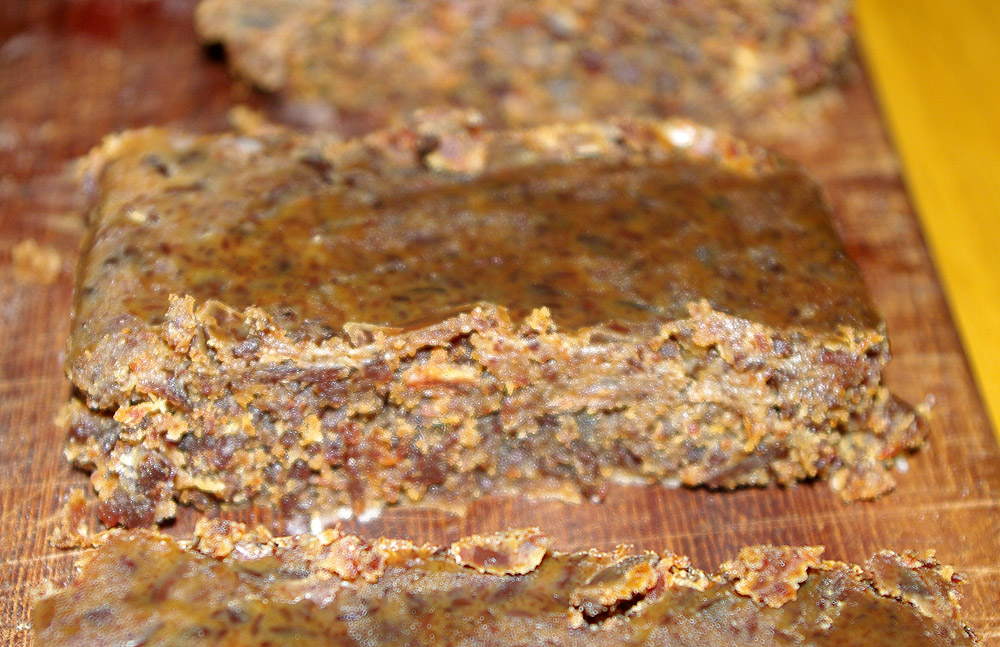 As I remember it from my days in
Antarctica it is fair to say that pemmican was not a particularly
appetizing looking food. It was something where practicality
and function won out over appearance, I also think I added a
bit too much fat for the amount of ground dried meat which didn't
help.
As I remember it from my days in
Antarctica it is fair to say that pemmican was not a particularly
appetizing looking food. It was something where practicality
and function won out over appearance, I also think I added a
bit too much fat for the amount of ground dried meat which didn't
help.It can be eaten as it as a high energy snack, though I never understood why anyone would choose to do this if there are alternatives available - and you have have to be somewhere very much out of the way to not have an alternative, like Antarctica maybe?
Having said this I tried some on a sledging biscuit and it was surprisingly tasty. The fat in the pemmican compensated for the lack of butter or spread and the crunchy bits that resulted from not grinding the meat fully to a powder gave me something to chew on which was altogether more pleasant than I imagined it would be.
The main purpose of making pemmican was however to use it as a basis for that legendary Antarctic food - Hoosh. Hoosh is a dish (I use the term as it is technically correct though a bit hopeful in this context) traditionally made of pemmican, sledging biscuits and snow.