Digital Photography Tips and Techniques
Having spent a significant amount of money on your digital camera gear, it makes sense to spend a little time on learning how to get the best from it. Here are a few simple ideas that everyone should learn that will make a noticeable difference.
Exposure - Flashies and Histograms
Correct exposure is about capturing an image with a good tonal range from pure black to pure white in the frame and plenty of detail in-between. Incorrect expose leads to a loss of detail that no amount of adjustment in the "digital darkroom" will ever be able to recover if the detail just wasn't there in the first place.
Most cameras offer a couple of aids to getting the correct
exposure at the time you take it, so allowing you to re-take
if necessary, these are the "flashies" and histograms,
your best immediate feedback on the technical quality of the
picture you have just taken - learn to use them and become a
better photographer.
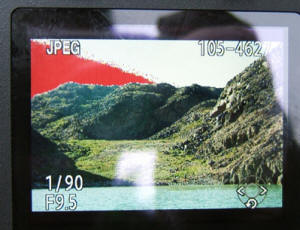
Flashies - a basic highlighter of exposure problems
Your camera will probably come set up so that you
can see a shot as soon as you have taken it on the screen.
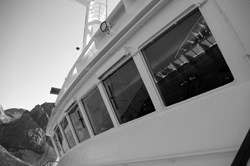
Sometimes you will see flashing red (or other color)
regions as in the picture to the left, caught in mid-flash.
The regions will be flashing red then white or black.
These regions are either over or under exposed and
you have lost detail in the flashing region. Lets say
that there are 50 levels of brightness in the picture
for simplicity. In the case of the picture to the left
it is saying that some of the levels say from 40 to
50 that should be distinct and have some detail are
all being put into the level 50 category - the brightest,
and all of the flashing pixels will be plain white in
the file so that part of the sky will have no detail.
Retake the picture while adjusting the exposure downwards
i.e. allow less light through the lens so the bright
end of the exposure scale is not overwhelmed. Use the
EV Compensation button
![]() to do this, then check again, the flashies should have
gone or be greatly reduced in extent.
to do this, then check again, the flashies should have
gone or be greatly reduced in extent.
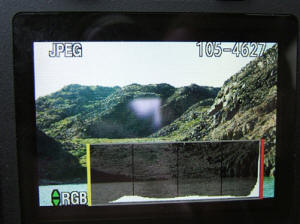
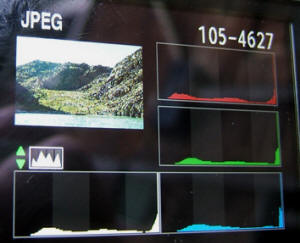
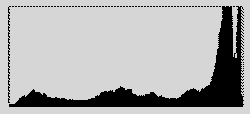
Histograms - a more refined highlighter of exposure problems
You should also enable a histogram to appear immediately after exposure along with the reviewed picture. This tells you how well spread and so accurately captured the details of the picture are.
In the example to the left the histogram is pushed over towards the right hand side showing that there is some detail that is off the scale at that point and so will be missing from the picture. If the picture is underexposed then the histogram is pushed towards the left hand side. Again the answer is retake the picture with exposure adjustment.
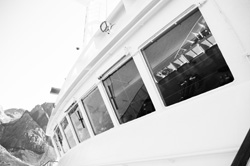
Using Histograms to identify correct exposure and exposure problems (a black and white image is used for clarity, colour works in the same way)
The peaks on this histogram are
well spaced across it's width and not pushed against
either edge. There is both black and white in the image
and a range of tones.
In this over-exposed image, the
histogram is pushed up to the right hand side showing
that highlight detail is lost and just appears white.
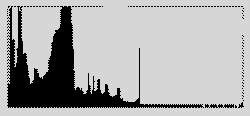
In this under-exposed image, the
histogram is pushed to the left hand side showing that
shadow detail is lost and simplified as dark grey or
black.
Again Use the EV Compensation button
![]() to
adjust the exposure, retake the picture and re-check.
to
adjust the exposure, retake the picture and re-check.
Basic Digital Darkroom Techniques
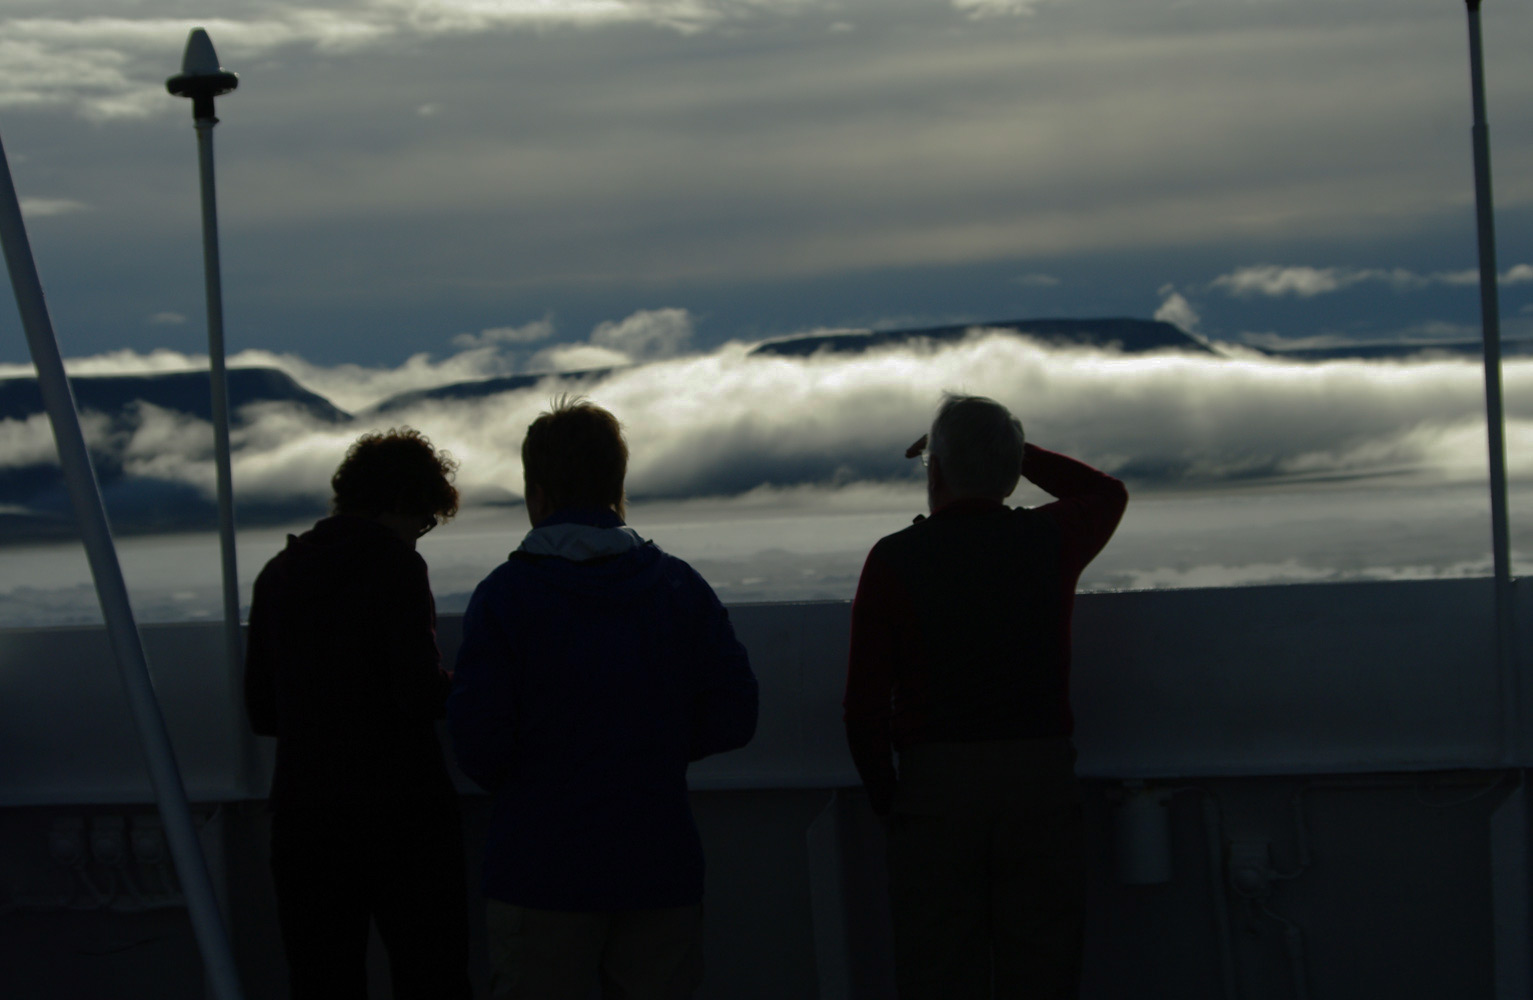
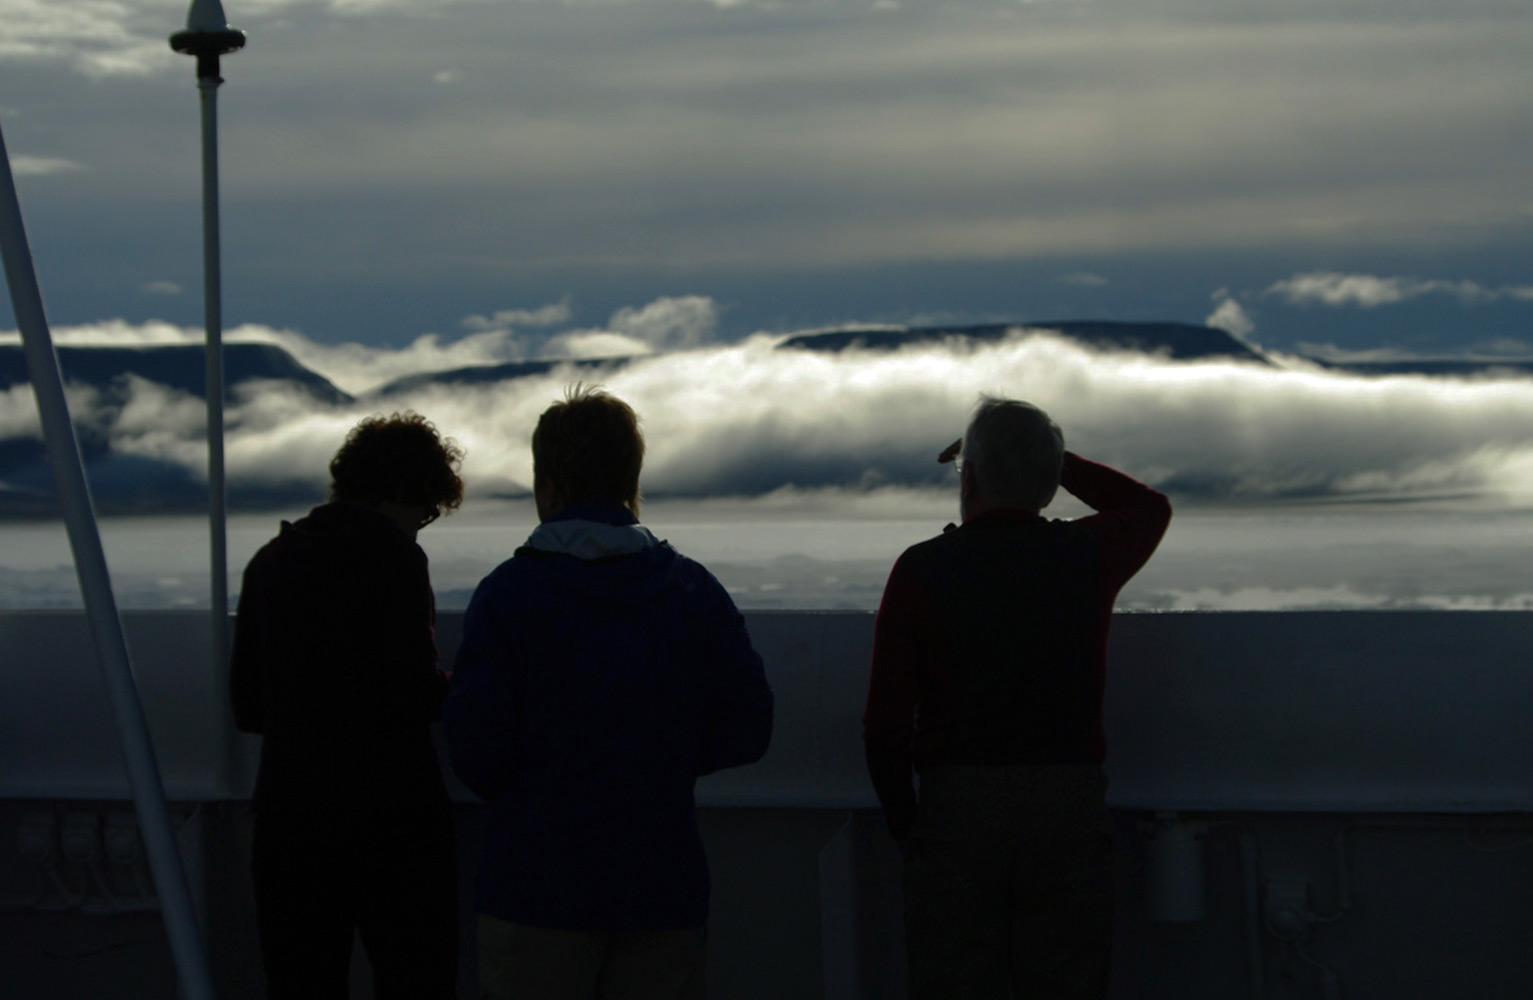
The Original Image - has promise but could be better.
I'll be using Photoshop to make adjustments, the changes I'll make are quite basic and other photo manipulating software packages can also perform the steps I will take.
Before you start, make sure you keep the original image and save any changes to a different file or as a different filename or you won't be able to go back again if it all goes horribly wrong - believe me, at times it will!
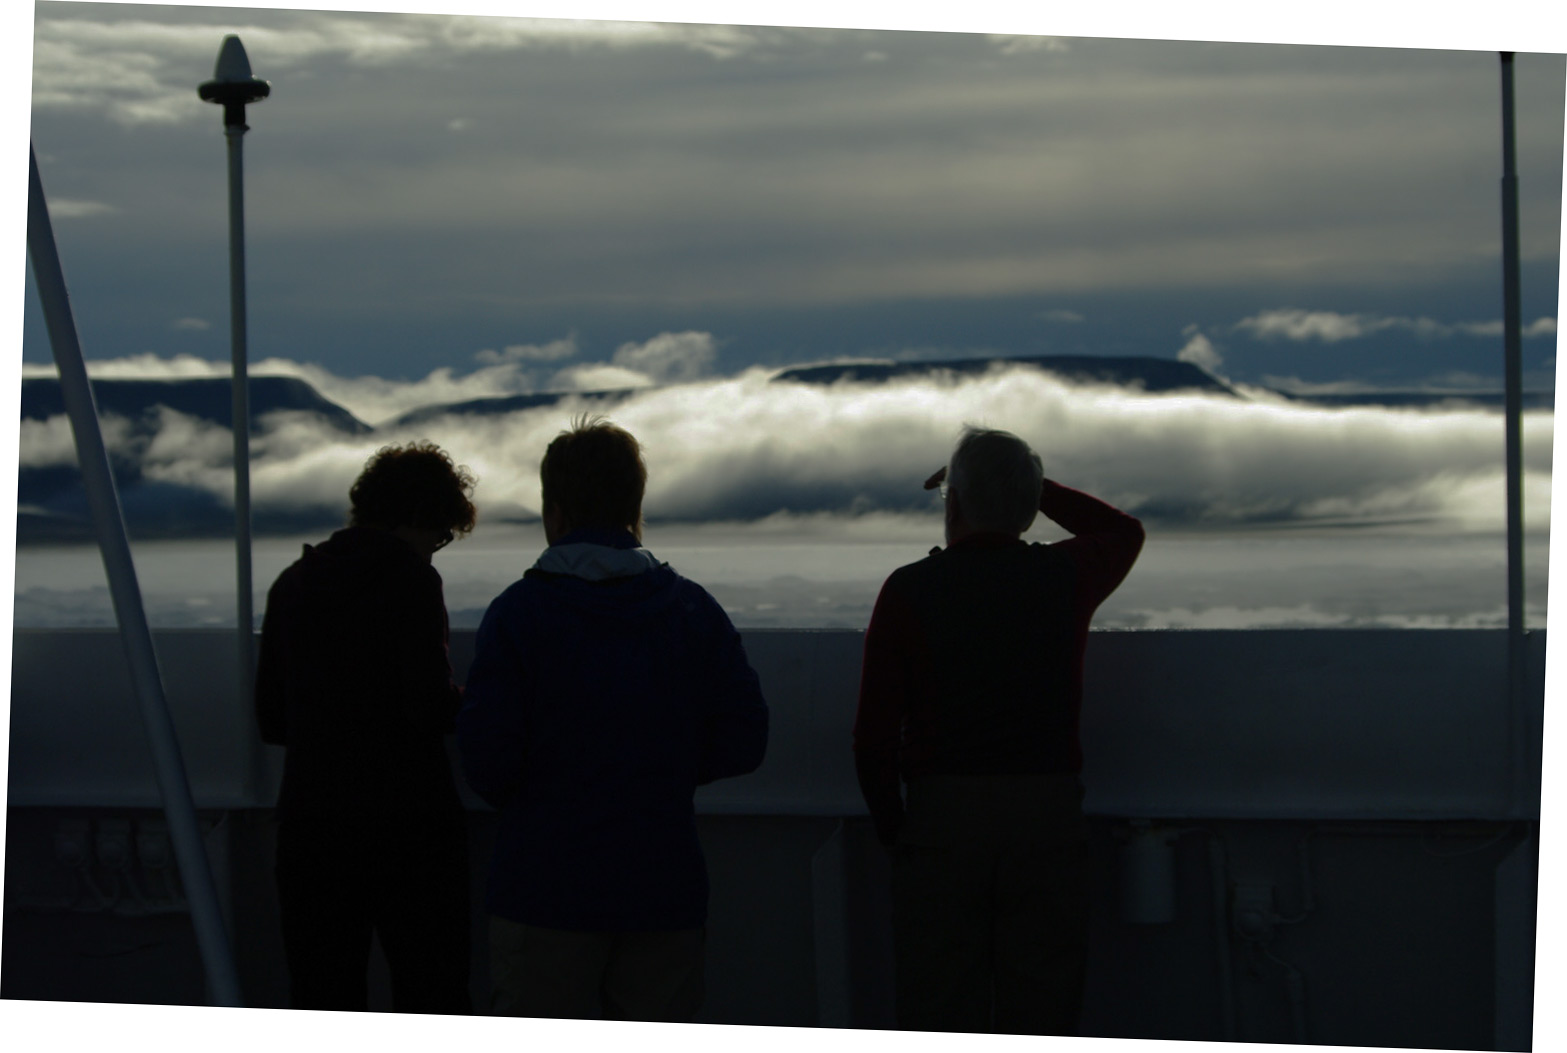
Rotation:
The original had a slightly sloping horizon, while I try
to avoid this when taking pictures, it's difficult to get it
right every time and pictures can be slightly off.
I
rotated the image by 2 degrees, you can see how the edges of
the picture have tilted as a result of this.
Pick an element of the picture that should be horizontal or vertical to get this right. You can turn on gridlines if necessary while you do this to make it easier, turn them off again afterwards.
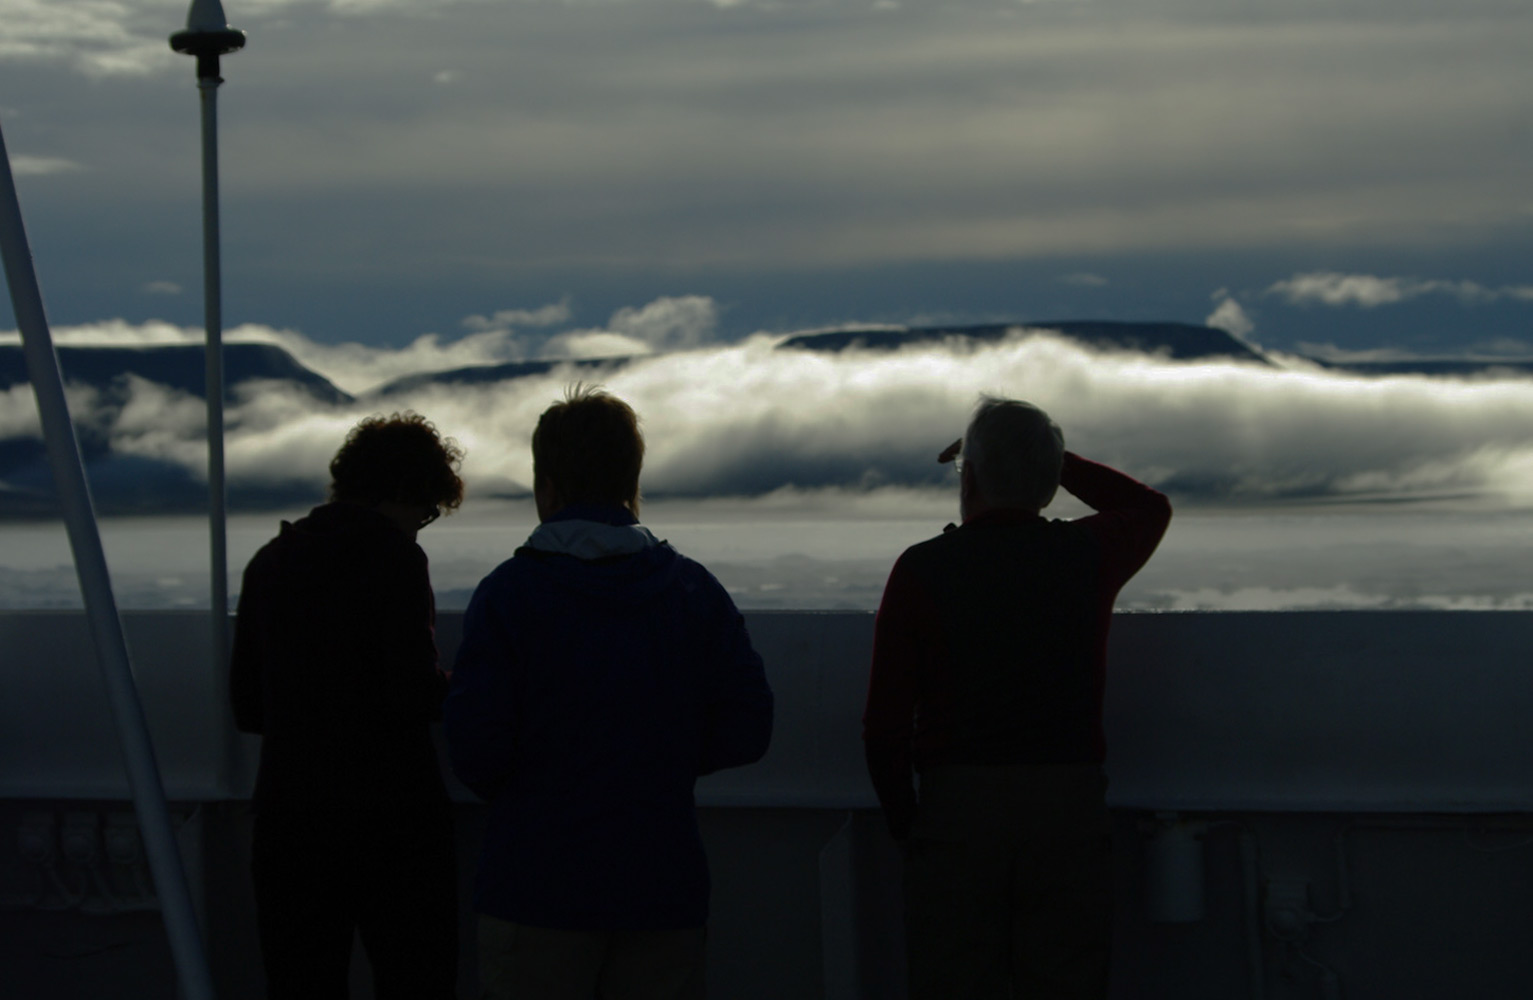
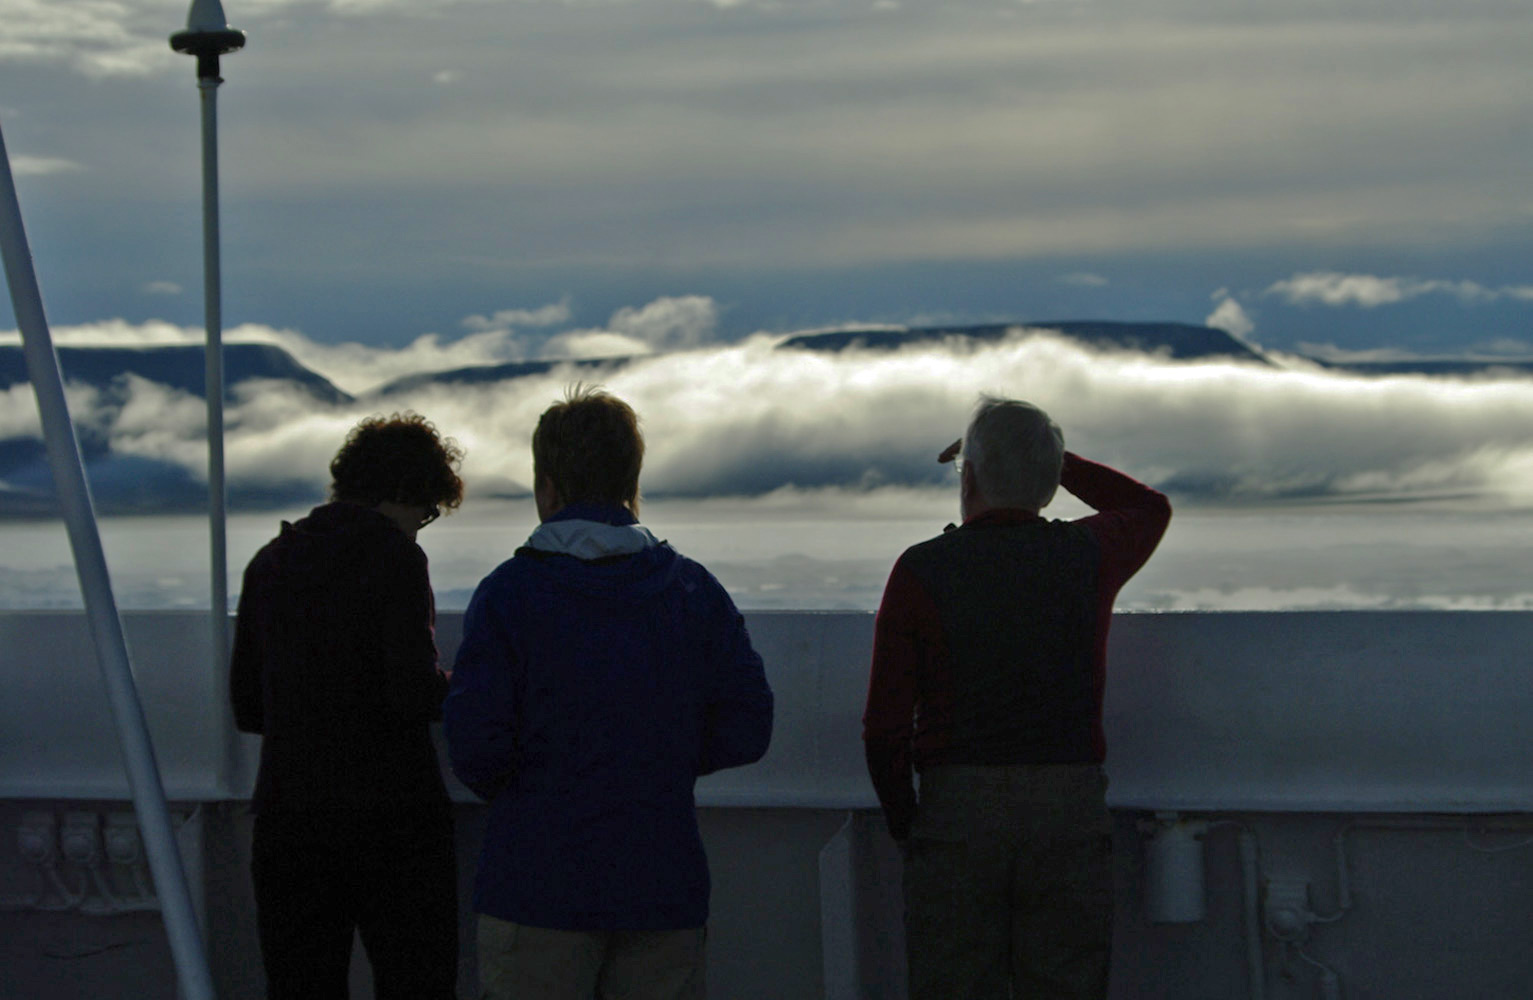
Crop after rotation:
Cut off those long thin white triangles that result from
rotating using the crop tool, you will by necessity lose part
of the image at the edges, more reason to get it right when
taking the picture than relying on making it better later.
This is also the time to crop the picture to remove peripheral
distractions or just nothingness and focus on the main elements
of the picture. I got rid of that pole at the right of the picture.
Adjust Tone, Contrast, Color balance and Shadow/Highlights
The original image was too flat and lacked something, so
I adjusted the color balance very slightly and increased brightness,
this time leaving contrast alone. I used the automatic levels
to do this and was reasonably happy with the results, Photoshop
allows you to fade any effect applied so I applied the automatic
level and then moved the slider down to a level I thought was
more suitable.
Finally I used the "Shadows" setting to
bring out some detail in foreground, you can see the difference
between this picture and the next. It automatically gives a
level of 35/100, I slid it down to 25 for this picture.
Set Image Size and Increase sharpness
Your image will probably be very large, 5,000px or more wide,
this is the time to reduce the size depending on what
you will use it for if this is applicable. If you are going
to print it, leave it as large as possible. If you are going
to post it on social media or email it to someone, then change
the longest side to 2,000-3,000px so it doesn't take so much
memory and/or look a bit odd when it is shown at a smaller size.
The last step was to increase sharpness using the sharpness
filter.

The original is at the left, the final image at the right. The key is not to make too many changes and not to make them too drastic or you end up with something that just doesn't look natural.
Image Optimization -
In this order, only rarely do all steps need be applied
to a particular picture.
Keep your original file and work
on a copy with a new filename
1 - Rotate image to correct any tilt.
2 - Crop image to remove triangles from rotation if needed, otherwise crop to frame the picture as you wish.
3 - Alter Tone, Contrast and Color, try to keep changes fairly subtle to enhance only or your picture can start to become a bit artificial looking.
4 - Bring detail out of the Shadows or Highlights. Many programmes have a Shadows/Highlights setting, this allows you to specifically only adjust the lighter or darker regions of your picture if there is detail "lost" in these regions, you can bring it out to some degree.
5 - Change the image size down to as big as you need for your purpose. Give the smaller file a new name so you still have the larger adjusted file in case you need it in the future. It is possible to upsize a picture, though not by very much as it soon looks of poor quality.
6 - Sharpen the image, there may be
more than one way to do this, but there is usually a simple
one step "sharpen" tool.
Curate your images - You decide what to show people
The potential downside of all these pictures that can be taken using digital cameras is that it's very easy and tempting to take a huge number of pictures of any particular scene, many of which will be very similar. There is nothing wrong in this in itself - it's one of the advantages of digital photography over film photography after all.However, please make sure you edit out the also-rans
and pictures that are so similar as to be no difference between
them.
I have been subjected to other people's
pictures myself where they maybe have two good shots of a scene,
but have shown about ten that are very similar as they can't
make the decision themselves as to which is the best one to
show. It doesn't make the viewing experience better, it just
tends to make it rather tedious.
So be a ruthless editor
when putting together a slide show of your trip, it'll make
what you produce all the more impressive for it.