Things to do When it's Cold Outside
Fun and cool outdoors things that is, not rearranging your cupboards
Clothing for Cold Wintery Weather: Dressing for the Cold | Winter Coats | Winter Tops | Winter Bottoms/Pants | Winter Underwear | Winter Hats | Winter Gloves | Antarctic Boots | Cold Weather Work Wear | Stylish Winter Clothing | Kids Winter Clothing | Kids Winter Coats
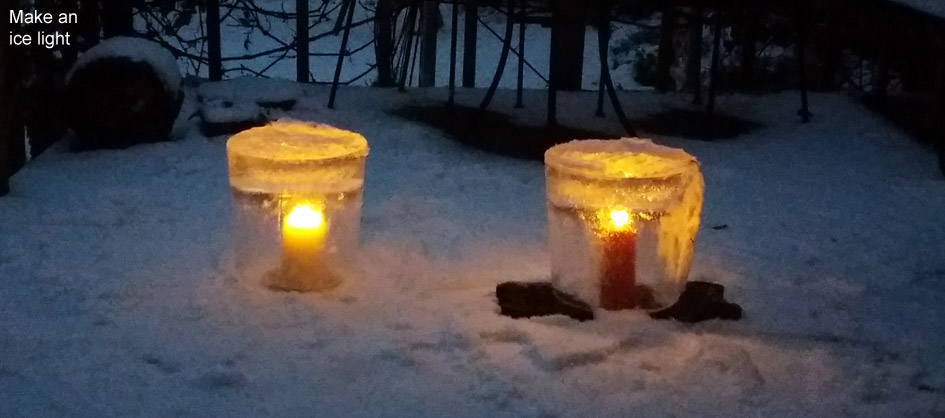
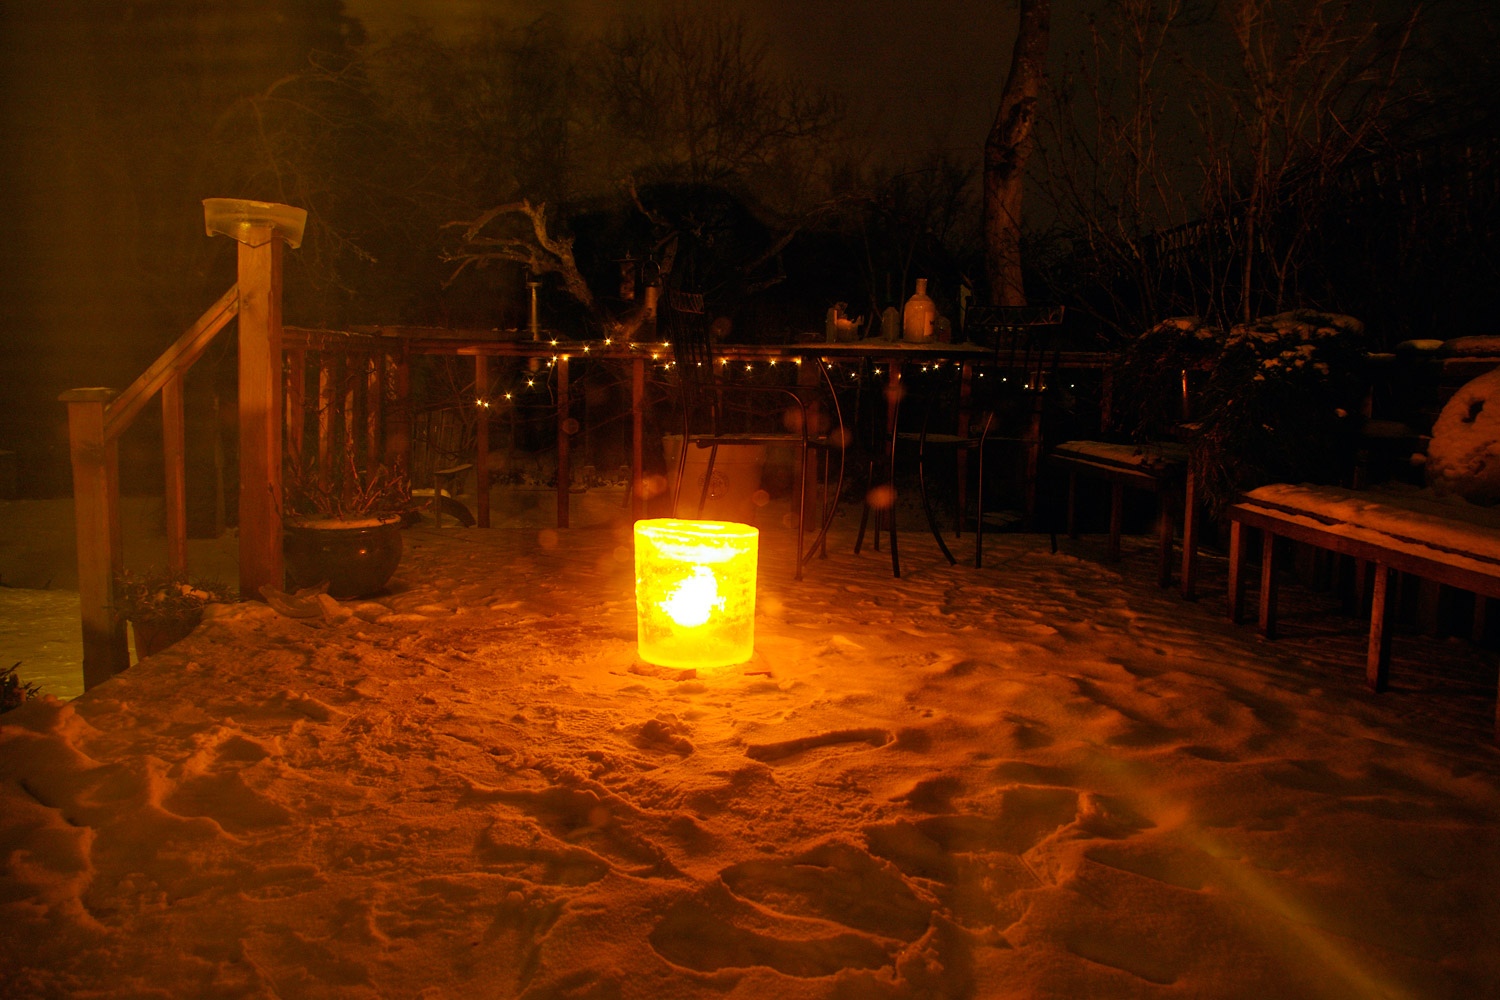
Make an ice-light - A Finnish tradition
Requirements -
bucket, water, large candle.
Temperature
- below freezing for 24 hours, the colder and longer the better.
Light it up before dark so you can see what you're doing
The chances are it's going to
be snowy as well as cold when you make your ice light, so the
light gets reflected around all the better.
Fill a bucket of water and leave it outside to freeze. It doesn't need to be really cold, just a few degrees below freezing will do, the actual temperature isn't so important as long as it consistently below zero so it doesn't start to melt again. The two in these pictures took a couple of days with temperatures of about -5C (23F) at night to -2C (29F) in the day time.
When you reckon it's ready, turn the bucket upside down and get the ice out. These had about a 10cm / 4" slab of ice on the top and walls of around 2" / 5cm thick, the walls freeze more slowly, don't tip it up too soon as they will break, and do it gently when you do. There should still be some liquid water in the middle at the bottom (watch you don't pour it all over your feet!) which makes a space for the candle. The speed of freezing depends on your temperature of course.
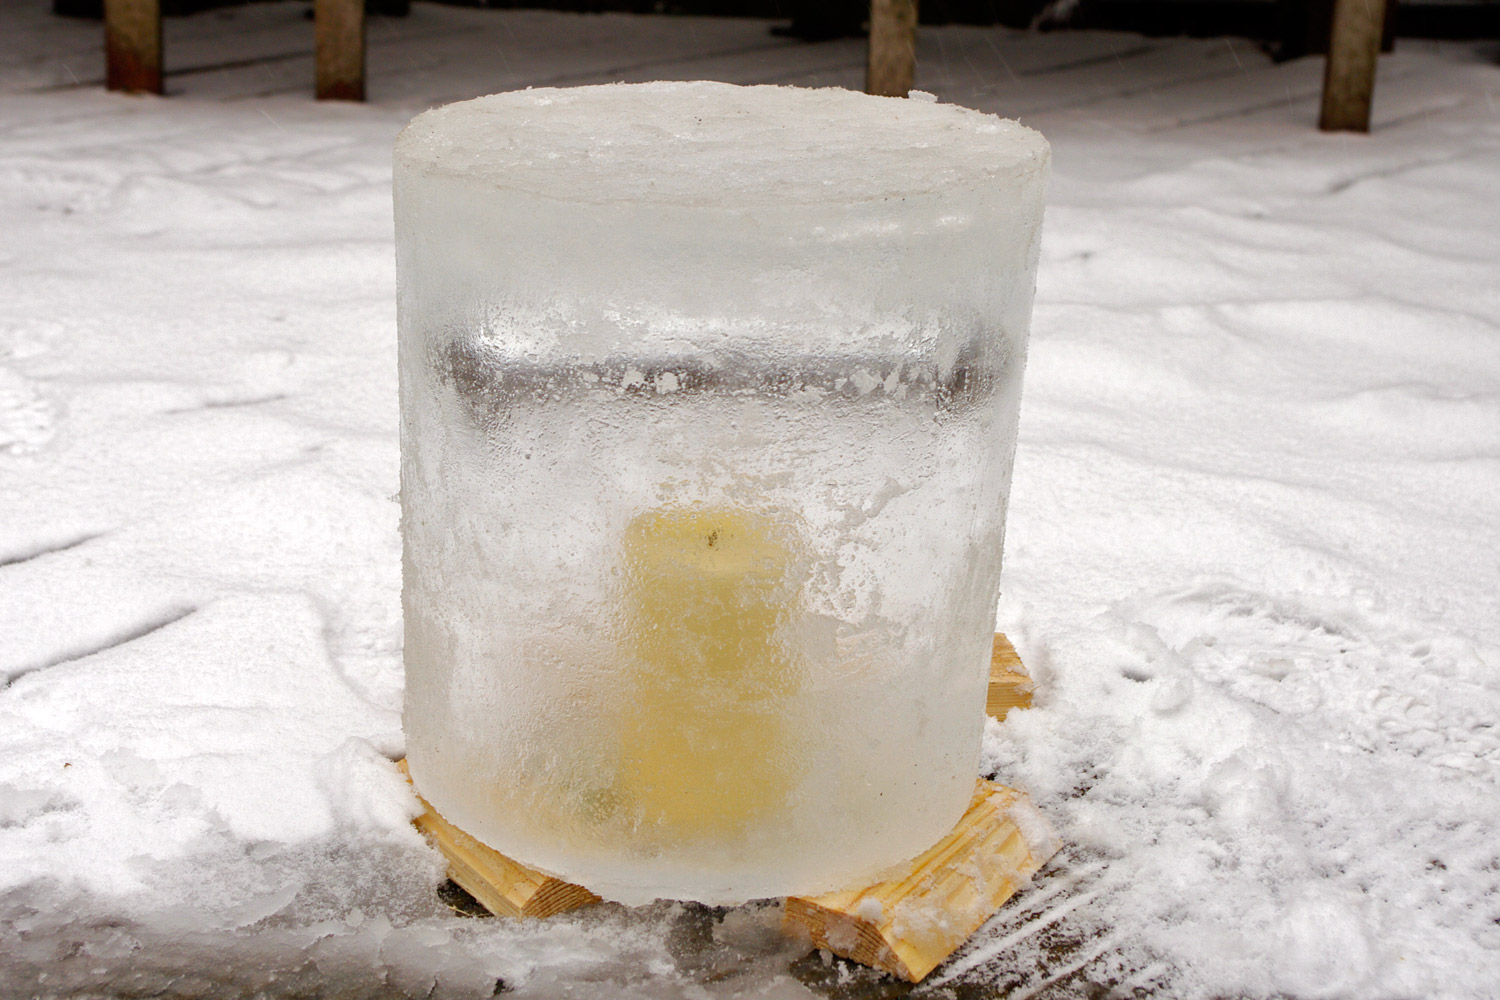
Tip the ice carefully out of the
bucket so the thinner walls don't break, remember there
will still be quite a lot of water in there too
I supported the sides on a couple of pieces of wood around 2cm / 3/4" thick to allow air in, light the candle, carefully place the ice on top and you've a beautiful icy light. The heat of the candle melts a hole through the ice above it after a while, but this doesn't seem to matter, the candle is protected pretty well by the ice walls from the wind not to blow it out.
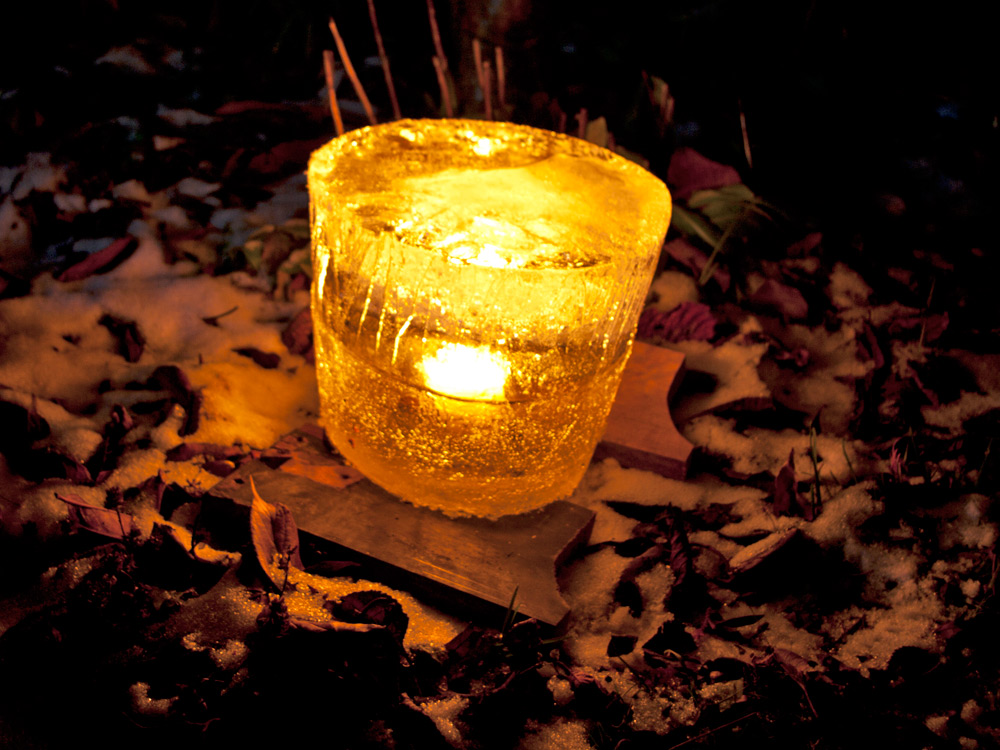
They make good welcome lights for
Christmas or New Year if it's cold enough at the time
Mix food dye with the water to get coloured ones or use a glow stick or two as a light source instead.
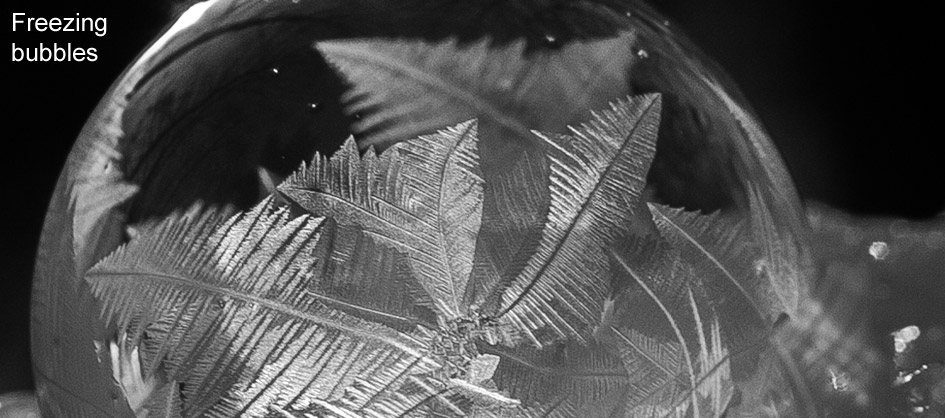
Freezing Bubbles
Requirements - Snow
or frost and no wind.
Temperature - Not so important as long as it's
freezing, the colder the better, but still works just below
freezing point.
Blow some bubbles from some mixture, allow them to land gently on the snow or a frosty surface and watch ice crystals spread across the thin water film of the bubble until it is all frozen.
The lady video below left gives a good set of instructions on how to do this, though you don't need to make your own mixture, any bubble mixture will work in the right conditions, hers makes the bubbles a bit more resilient and less likely to pop.
It does take patience and preferably absolutely still conditions, put a pile of snow on a table and gently blow using a straw rather than the bubble wand if possible. When I tried it wasn't as still as it might have been and the bubbles started to fall to the ground then rose up and over the neighbours houses, I could only feel the gentlest of air movements, almost not there at all. If the bubbles fall too heavily (imagine that, a heavily falling bubble!) they can get popped by the snow or frost.
If it's sunny you'll see them better if you look against the sun, a dark background will help too if you can put something behind the bubbles.
Don't get put off if it doesn't work first time, it's fun when it does work and the set up is minimal when you have your bubble mixture ready.
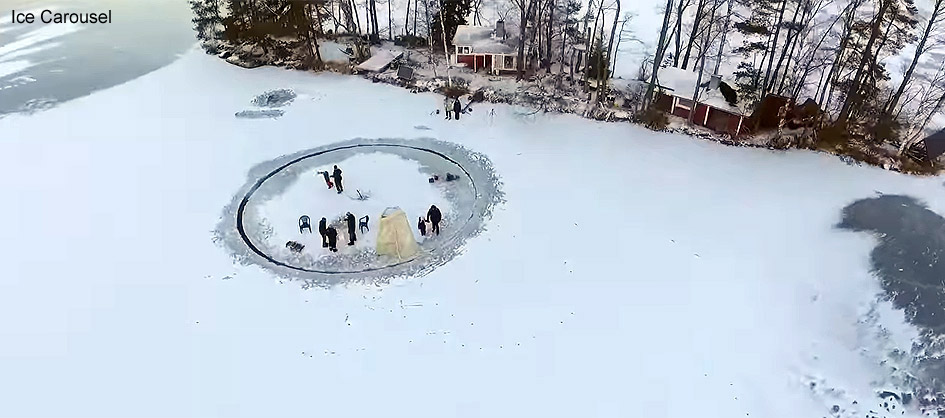
Make an ice carousel
Requirements- a frozen lake or large pond, chain saw, rope, stake, spade or shovel, outboard engine, wood for a supportive frame.Temperature - not so important, the ice needs to be safely walkable, 15cm or more.
Another great idea from Finland where
they have lots of lakes and ponds that freeze over in winter.
I've never tried it, not living near anywhere suitable,
but it looks like a great fun thing to do.
Place your stake in the ice so it doesn't wobble, tie the rope to it and scribe a large circle on the ice. Use the chain saw to cut around the line you have scribed so you have a floating circle of ice. Site the outboard motor on a wooden frame cut through a hole in the ice and use it to spin the ice disc around. That's the theory I'm guessing the practice is a bit more tricky to do, getting the circle really accurate will make it work so much more easily.
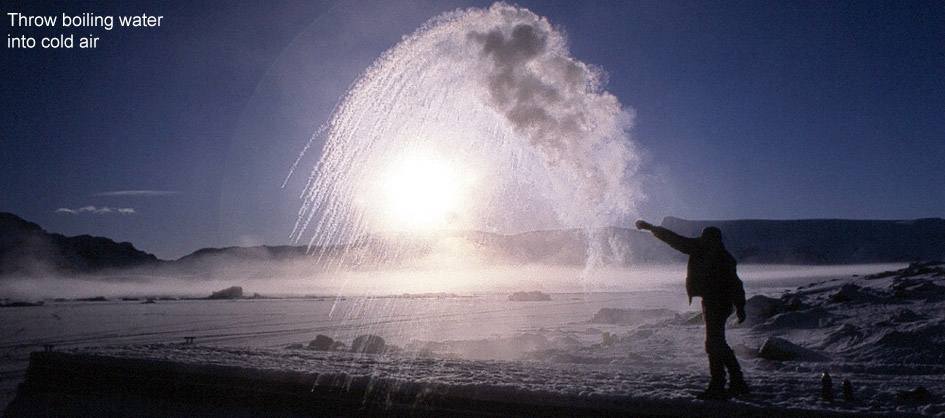
Throw hot water into the air and watch it drift away as steam
Requirements- boiling
water, plastic or insulated cup.
Temperature
- below -20C / -4F
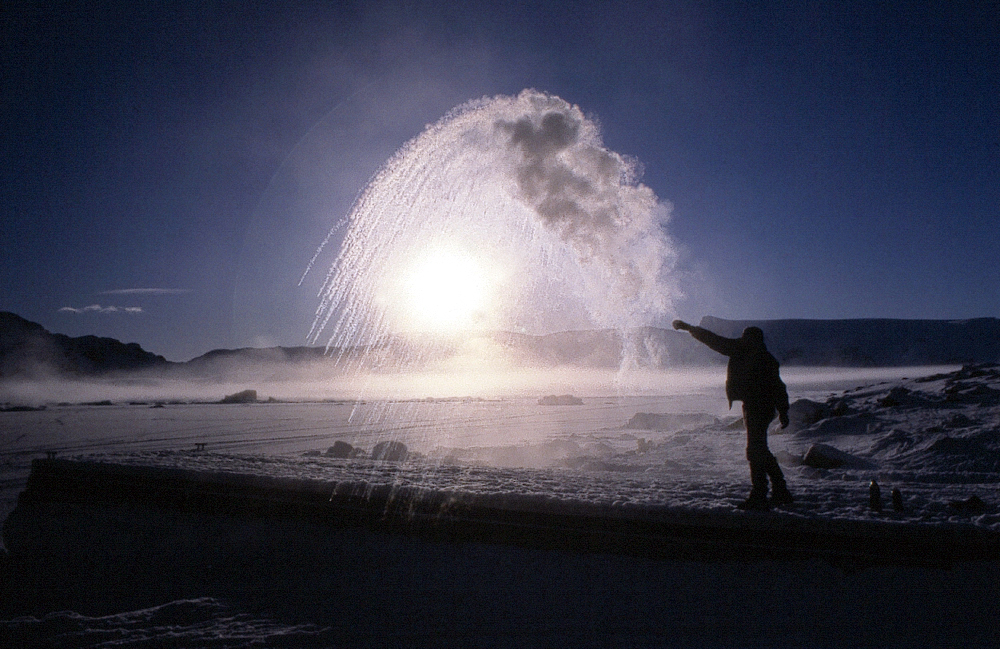
It needs to be much colder for this one, it works better the nearer to boiling the water is and the bigger the difference between the hot water and the air temperature. Try it on the coldest day you can and do what you can to keep the water as hot as possible, realistically it needs to be below around -20C for good results.
Get a vacuum flask if you have one and fill it with boiling water (take care) leave for a minute or so to heat the flask up, pour it away and fill again with boiling water, put on the lid and go outside. If you don't have a vacuum flask a jug or pan will work but will lose more heat, if possible use a plastic jug or similar, if not, then glass, metal is the last choice. You'll also need a cup or even better an insulated mug.
Pour some of the water into the cup and throw it into the air. Marvel at how the hot water goes up but then turns to steam and simply drifts away! There's lots of opportunity for photography too, get into position with a plain background behind where the steam will be and play around with shots into the sun or lit by the sun from the front.
If it's very cold and you're very careful, you could even try to put some in a supersoaker, water pistol or similar and puff out steam.
In a similar vein try blowing soap bubbles and watch them freeze into ice crystal balloons before they land (or maybe shortly afterwards)
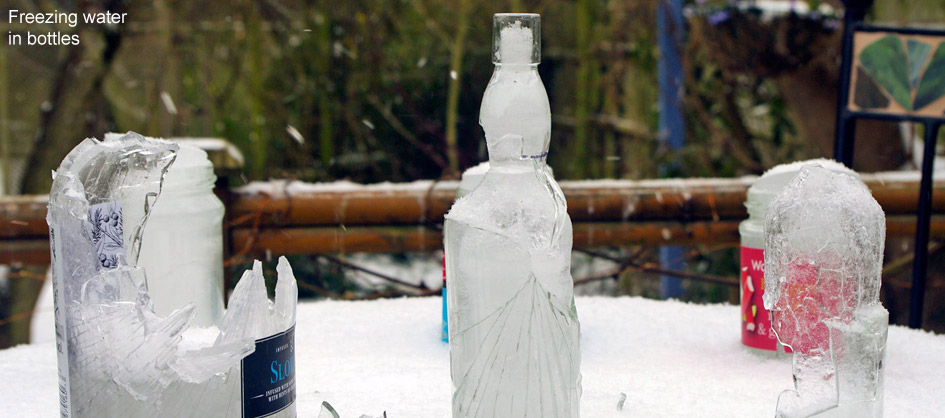
Expanding ice and bottles
Requirements- empty
glass bottle or jar with or without top, water, optional
- drill or saw
Temperature
- below freezing for 12+ hours
A simple one but fun for the younger ones or if you've never done it before.
On a cold night / day fill a bottle with cold water and screw the lid on tight, place it outside and wait a few hours or until the next day, this is a good one for overnight. As the ice freezes it expands and so will split or break the bottle. Glass works best here, plastic bottles tend to just expand with the water, even with the lid screwed on tight. You do of course have broken glass to clean up (easier if you can leave it until the ice has melted) placing on a tray first will make the clear-up easier.
Variations:
Leave the top off the bottle but fill it right to the very brim, you can get a column of ice coming out of the top of the bottle.
Drill a hole in the bottle top or make a slit with a hammer and chisel, with some experimentation you can make some cool shaped ice extrusions.
The results of this vary with how cold it is, or if the temperature is falling, by how quickly it falls.

Carnage the next day - but quite
interesting carnage
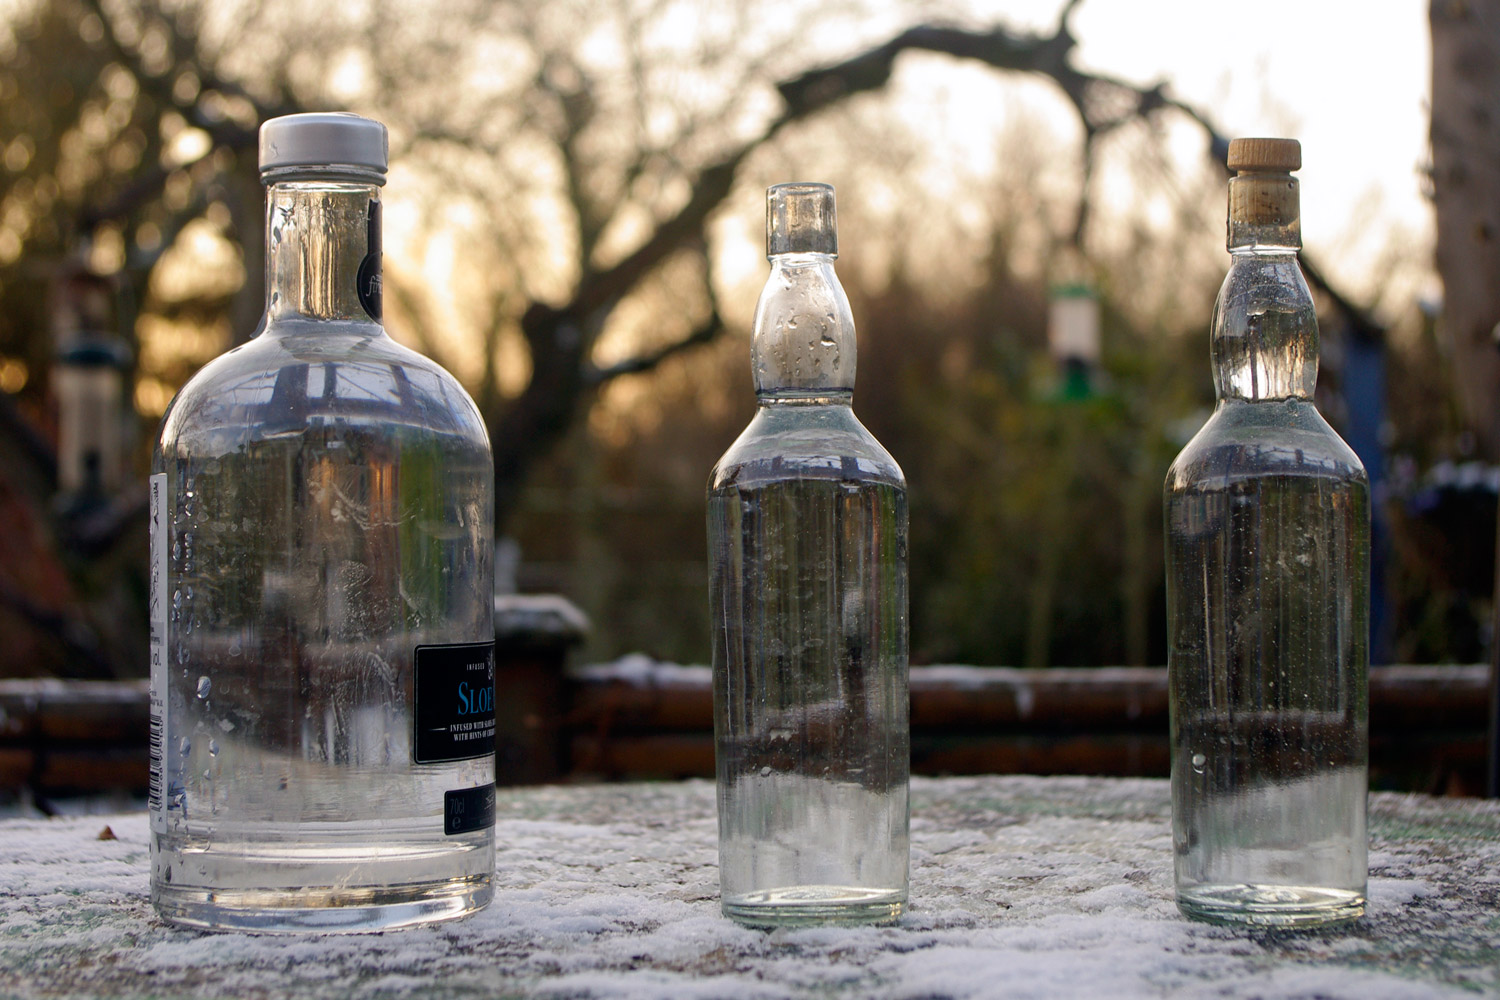
I started with good intentions, hole drilled in the cap on the left, line drawn at water level in the middle
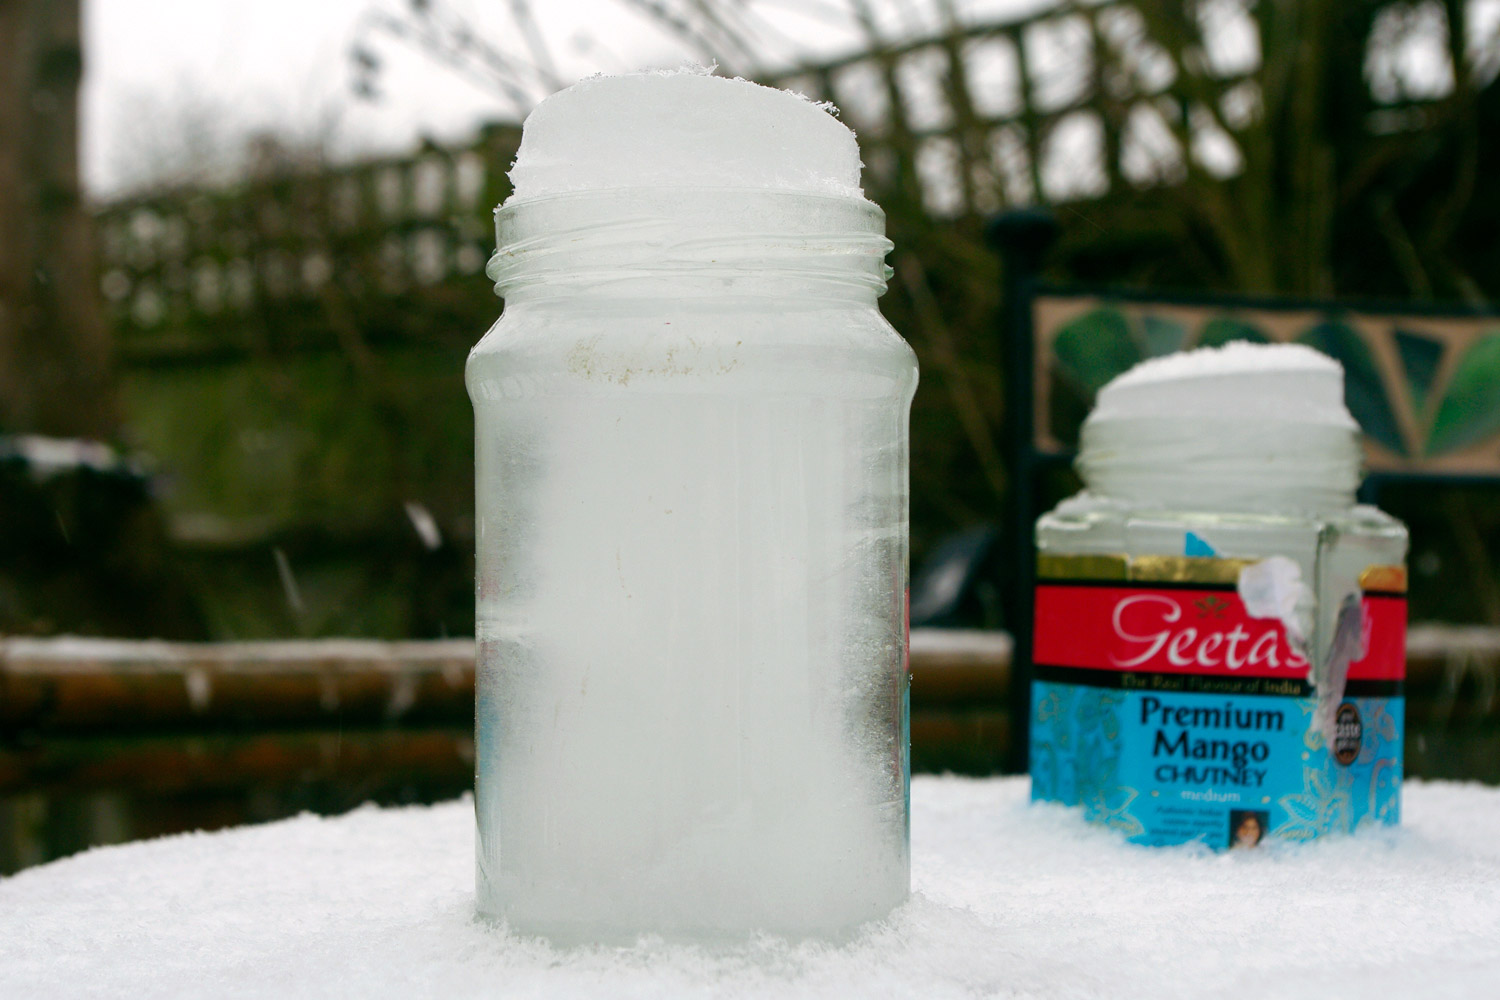
These jars had metal lids with holes or slits cut in them, they just popped the lids off as the ice expanded

This bottle with no top produced a solid column of ice after a not-that-cold night
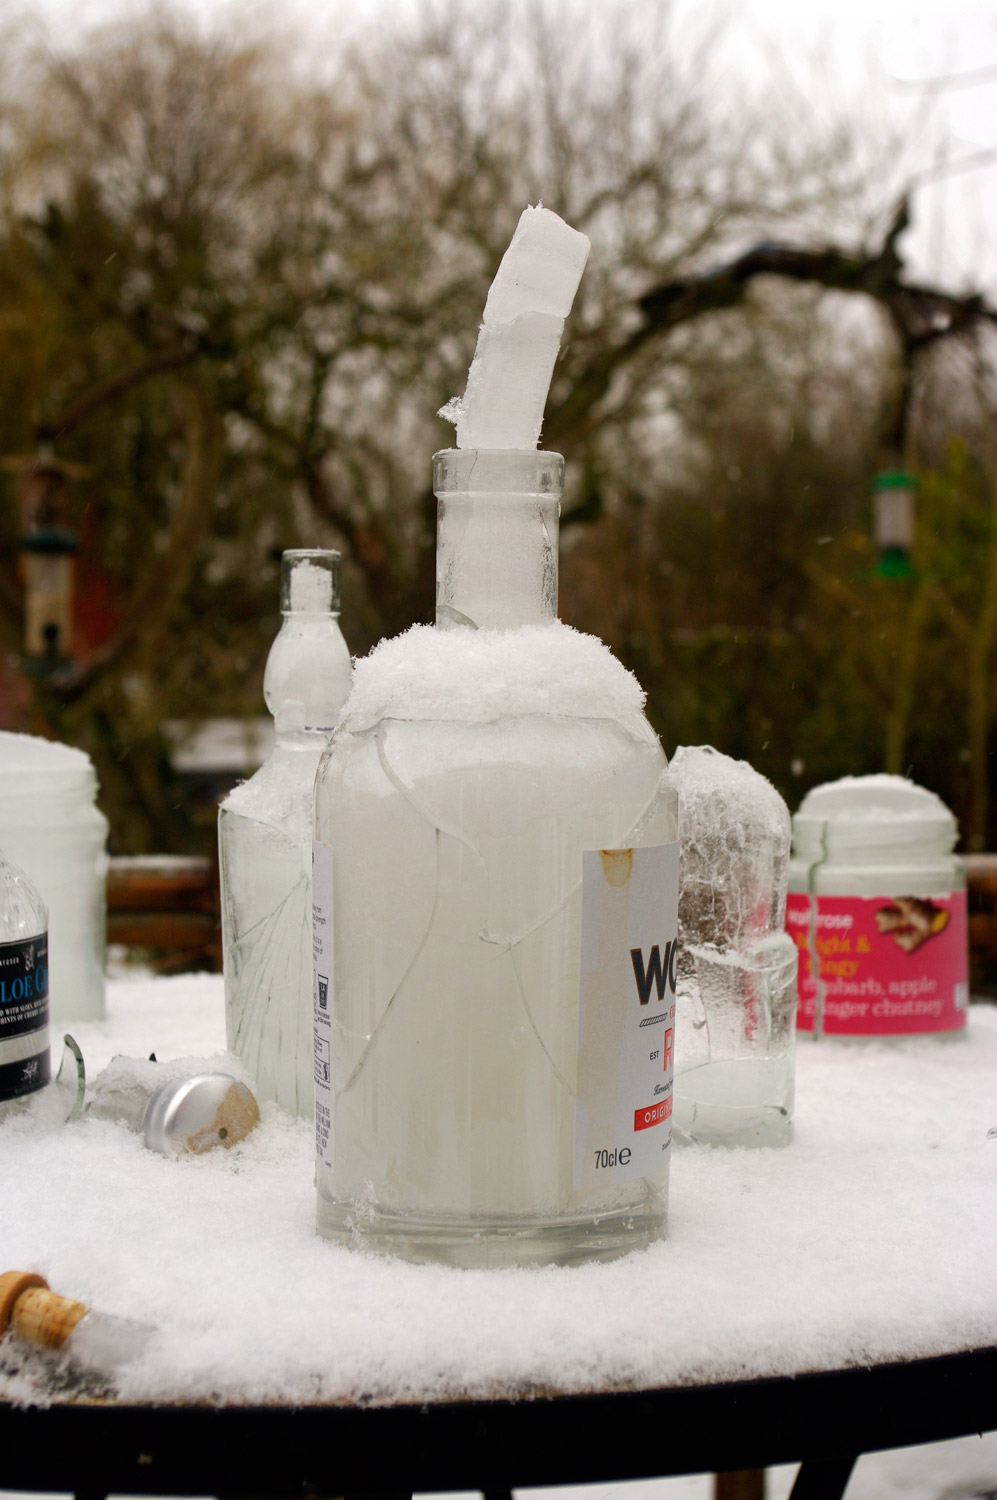
A second colder night (and some snow) grew the column and broke the bottle
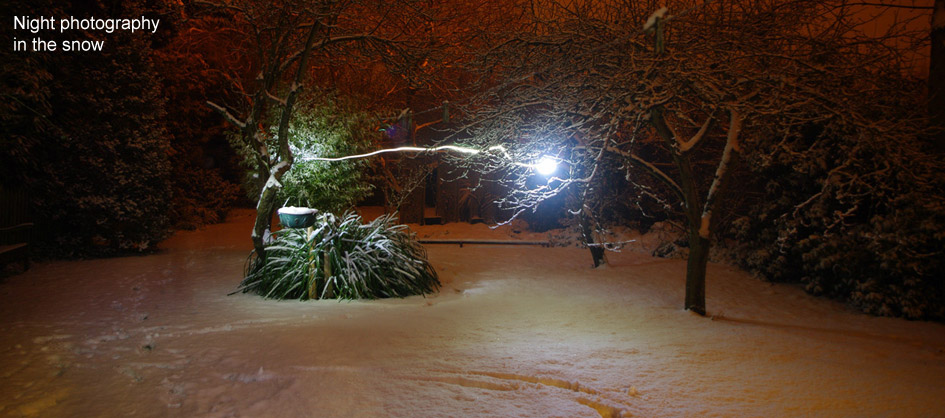
Night photography in the snow
Requirements- camera, a phone will do, light source such as camera flash, torch or laser pen.Temperature - needs snow on the ground, better if it's still falling too.
I love snow at night, especially if freshly fallen as it makes the night that much lighter and magical, if there's a bright moon you can get about without any other form of lighting. These are some examples of pictures I took in my back garden one winter's night when the snow started to fall after dark.
I used a dslr camera on a tripod with a self timer so I could get into position when necessary, the cameras automatic exposure system gave anywhere up to about 30secs exposure time to move me and/or the light sources about.
I'm sure any kind of camera will work, you just have to work within its limits. If you don't have a tripod for long exposures, hold it against a wall, fence, table etc. to stop it wobbling and use the self-timer. You'll need a light source, I used the flash on the camera, a head-torch and a green laser pen in various combinations. I'm not claiming you'll get any great pictures to show other people (and I am hoping you will not be too harsh in your judgments of my pictures here gentle reader), but there is something very satisfying and probably educational too about the process and I thought it was great fun to do. The orange glow in my pictures comes from nearby street lights.
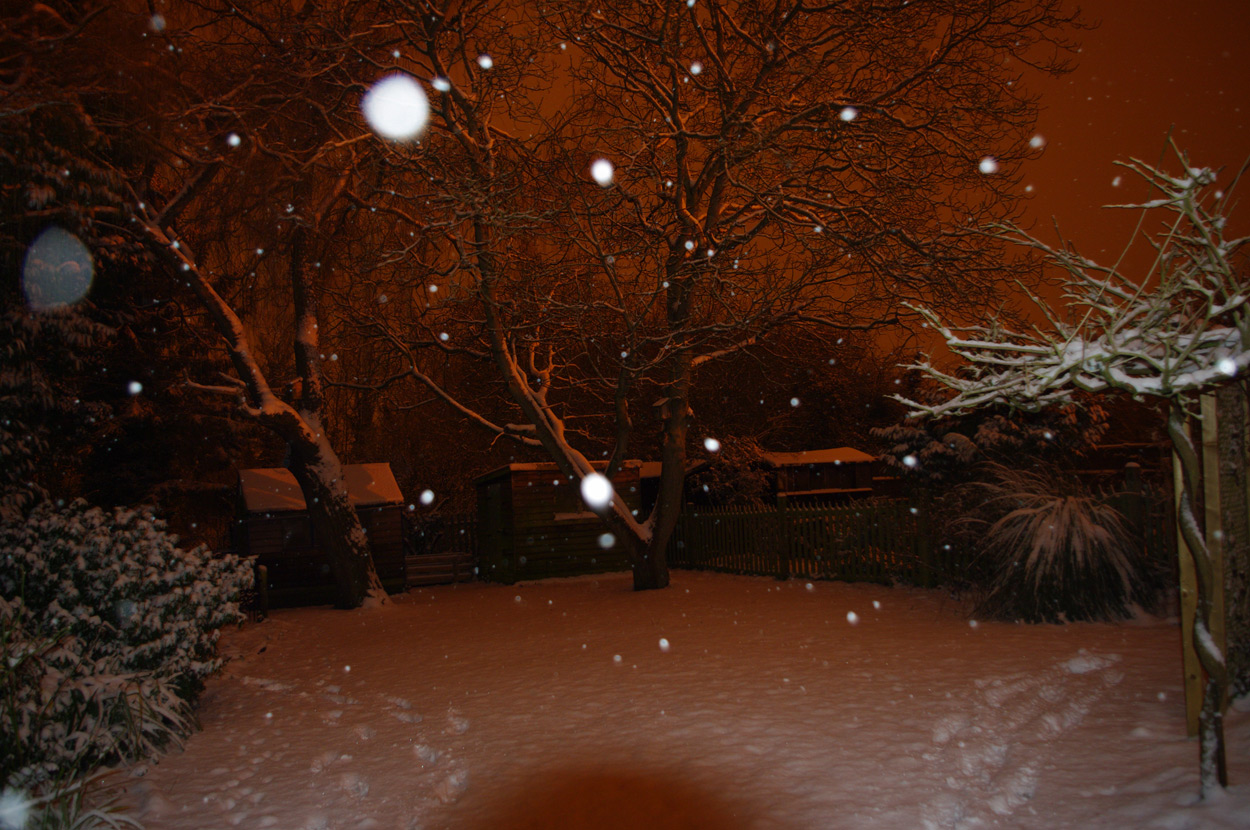
A simple shot using the camera flash of falling snow
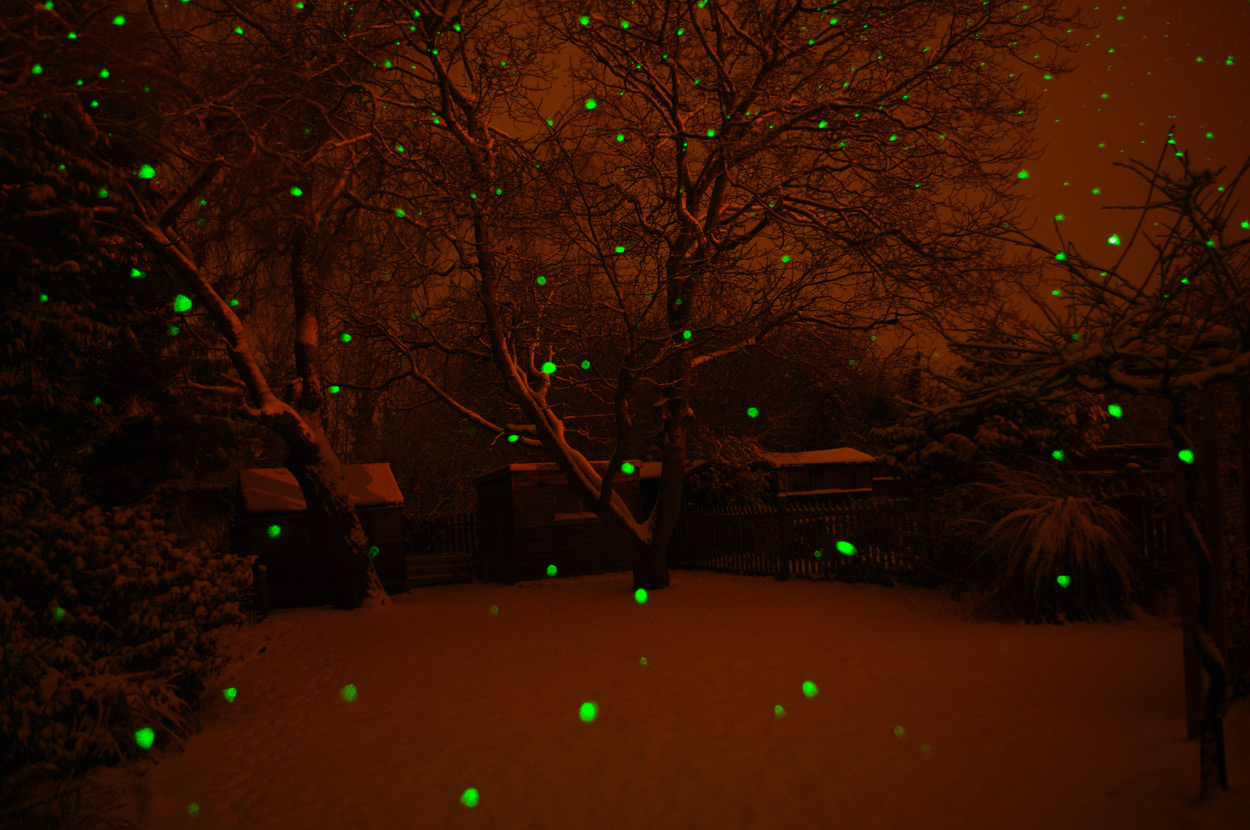
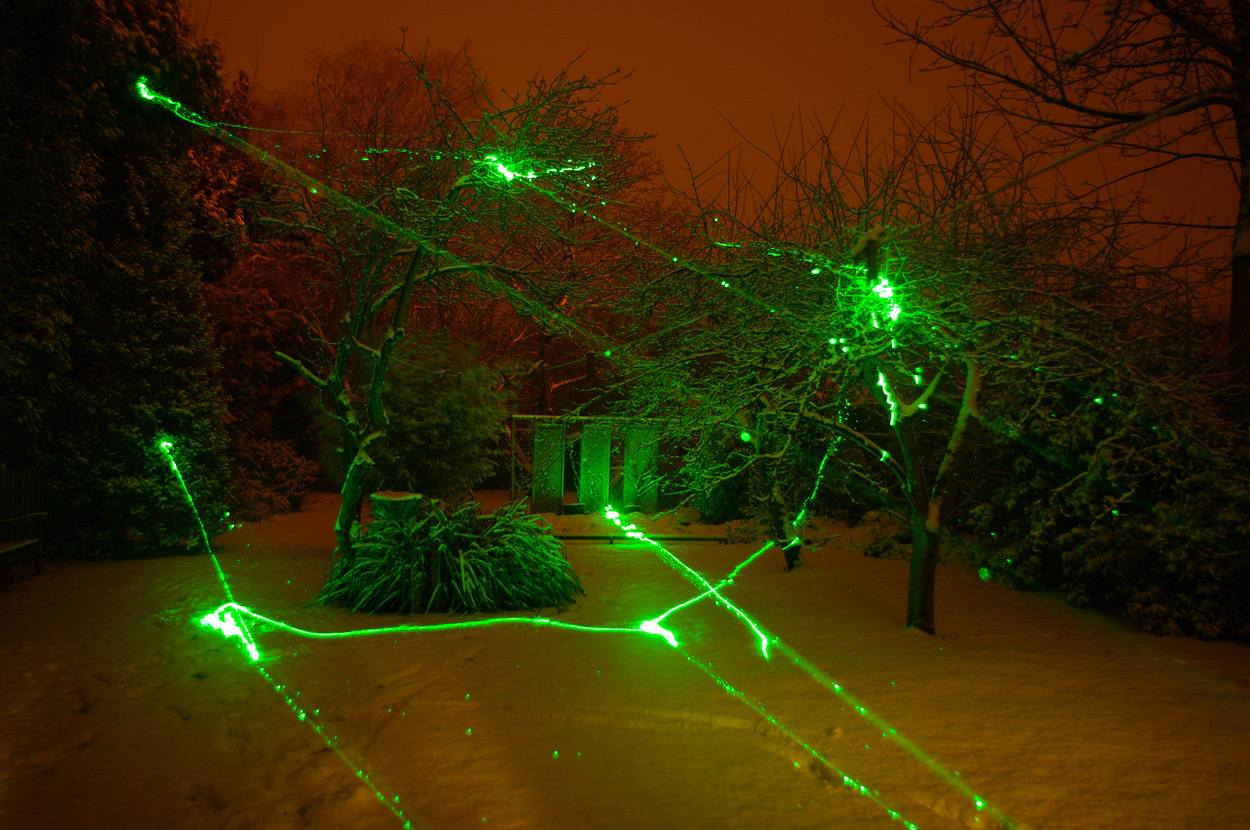
A long exposure with camera on a tripod, no flash, wave green laser pen around like a mad thing to illuminate falling snow flakes
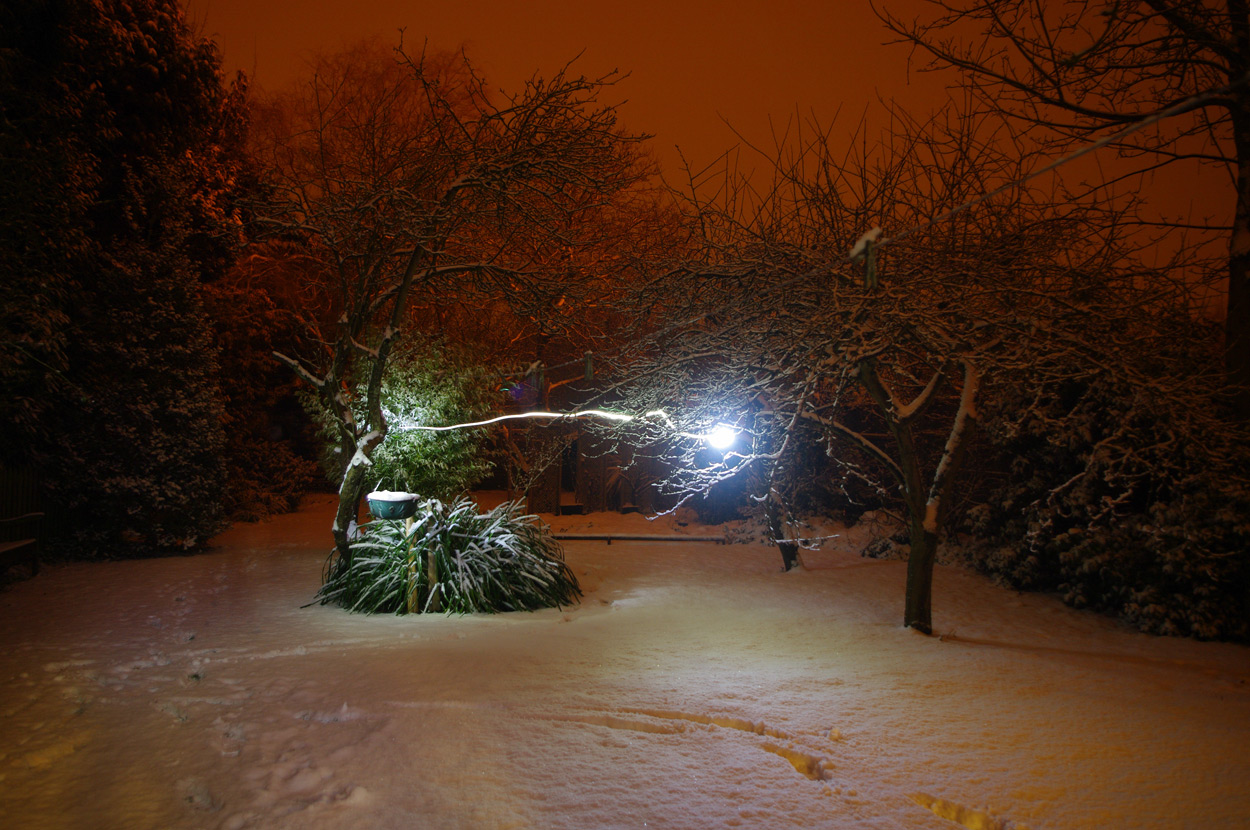
Camera on a tripod, head torch as light source, set self timer on camera, get in place, stand still a while then move to another position during exposure.
Camera on tripod, long exposure (auto) use laser pen to shine around on ground, falling snow and trees.
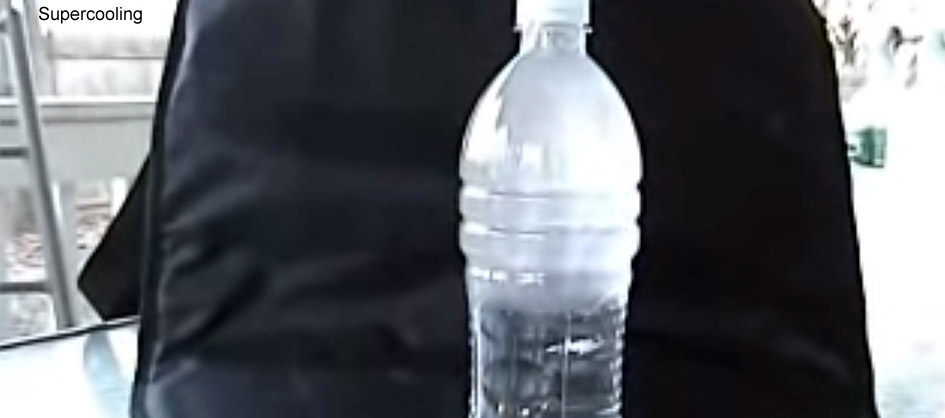
Supercooling
Requirements- empty plastic bottles with tops, optional - piece of substantial metal at least 10cm squareTemperature - below -20C / -4F, but maybe less cold
If you have more time and/or patience, you could try supercooling water.
The idea is that you can cool a liquid below its freezing point and as long as it is clean and undisturbed it won't freeze for a while despite being cold enough to. When it does freeze, it does so very quickly.
You could try this using your freezer but there's a lot of potential for messiness that is more easily dealt with outdoors.
Take several clean plastic bottles and fill them with water, screw on the lids and leave them outdoors in a totally calm spot where it is below freezing, even a small amount of movement by the wind can cause the ice to form rather than the water to supercool. As a guideline for a 500ml / 1 pint bottle, 3 hours at -20C (the temperature of most freezers) is the right sort of time but it's very variable. Some of the bottles may have already frozen solid (and so split - hence this is better outdoors) but hopefully some should still be liquid and supercooled.
Carefully pick one of the still liquid ones up and either tap the side sharply, tilt upside down or shake it gently. If you're lucky and it is supercooled you will see the liquid water turn to ice starting within a matter of seconds and spreading throughout the bottle.
Another variation is to very carefully unscrew the top from the bottle and pour it onto a very cold hard surface with a small piece of ice on it as a "seed" to start the ice formation off. This time if you're lucky, you will make a mound of ice as the water comes out liquid but almost immediately freezes as it hits the already frozen surface, make sure of that small piece of seed ice to start with.
Shrinking Balloons
Requirements-
balloons, pen, ruler
Temperature
- below -20C / -4F
 Ok,
I admit this one didn't turn out to be that much fun when
I tried it, but it did work and can lead to some useful practice
calculations (assuming you consider calculation practice
to be useful). I have seen reference to it elsewhere sometimes
accompanied by misleading pictures, see the calculations for
how you can tell this.
Ok,
I admit this one didn't turn out to be that much fun when
I tried it, but it did work and can lead to some useful practice
calculations (assuming you consider calculation practice
to be useful). I have seen reference to it elsewhere sometimes
accompanied by misleading pictures, see the calculations for
how you can tell this.
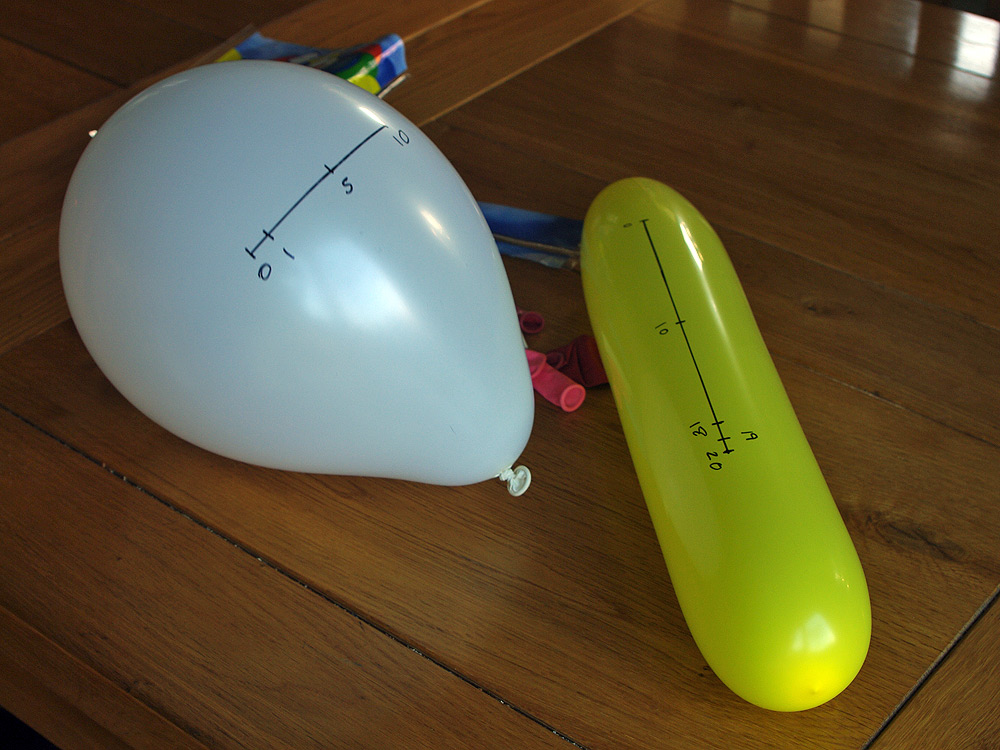
The idea is that you blow some balloons up indoors where it's warm and mark them by drawing something on them. Being of a scientific persuasion I drew some lines with a ruler and marked them at 1, 2, 5,10 and 20 cm points (or thereabouts). They are then placed somewhere cold, I put them in my freezer as a trial rather than outside as it wasn't so cold there. The air will occupy a smaller volume when cold and the balloons will shrink. Several hours later I took them out and measured the lines I had drawn to see how much they had shrunk. The answer was not much, so back they went, and again, and again. They definitely had shrunk as when I first put them in it was a bit of a squeeze, when they'd cooled down they were loose in their position amongst the frozen food. My room temp was 20C, freezer temp minus 20C, a 40C difference.
The 20cm (200mm) line on the yellow balloon shrank down to 194mm, yes that's a 6mm reduction! (I did warn you).
194mm from 200mm is a shrink ratio of 194/200 = 0.97
That's one dimension and we can assume the ratio of the other 2 in the volume are proportionally the same, so the volume shrank by a factor of 0.97 x 0.97 x 0.97 = 0.91
The volume of air is proportional to its temperature (Charles Law) this table shows a ratio of 0.99 : 0.86 of +20C to -20C air or an expected reduction in volume to 0.99/0.86 = 0.87
Which is in the ball park of my measured 0.91, I had a 9% reduction compared to a theoretical 13%.
To get exactly 0.87 would give a linear shrinkage of the cube root of 0.87 or 0.87^1/3 = 0.95 (converting from volume change to linear change)
My 200mm line would have shrunk to 200 x 0.95 = 190mm, 4mm off from what I got.
If you investigate this online you may encounter some apparently far more shrunken balloons than this in the same circumstances, they have mainly just deflated. The test is to bring them back into the house to warm up again when the length of the line you have drawn should return to its original value. If it doesn't, the balloon has just leaked some air.
Have fun!
Picture credits: top slider - Frozen bubbles - Paul-VanDerWerf, Brunswick, Maine, USA, used under CC BY 2.0 licence / Ice carousel, Supercooling stills taken from Youtube videos shared on this page.